Canon P - Rangefinder Film Camera
Cako

Characteristics
- Type: 35mm focal-plane shutter rangefinder camera
- Picture Size: 24 x 36 mm
- Lens Mount: Leica threaded mount (M39)
- Shutter
- Two-axis, horizontal-travel focal-plane shutter with metal curtains.
- Single-axis non-rotating dial for X, B, 1, 1/2, 1/4, 1/8, 1/15, 1/30, 1/60, 1/125, 1/250, 1/500, and 1/1000 sec.
- Equipped with built-in self-timer.
- Flash Sync: FP- and X-sync (automatic-switching sync contacts, X-sync speed of 1/55 sec., and bayonet terminal socket on camera side).
- Viewfinder: Coincidence rangefinder integrated with Lumi-field viewfinder featuring frames for 50mm and 100mm lenses within the full field for 35mm lens. Automatic parallax correction.
- Film Loading & Advance: After opening camera back, insertion onto spool. Advances with camera-top advance lever (130 single or partial strokes).
- Frame Counter: Counts from 0 to 40 and resets automatically when camera back is opened. Film advance and rewind status indicator provided.
- Film Rewind: Collapsible crank.
- Dimensions & Weight
- 144 x 76 x 71 mm, 790 g (with 50mm f/2.8)
- Exposure Meter
- (Canon Meter: sold separately) Aperture-reading selenium photocell coupled to the shutter speed dial.
- Metering range (at ISO 100) switchable between EV 10 – 19 (high) and EV 4 – 13 (low). With the low-light booster attached, metering to EV 2 is possible.
Manual
Introduction
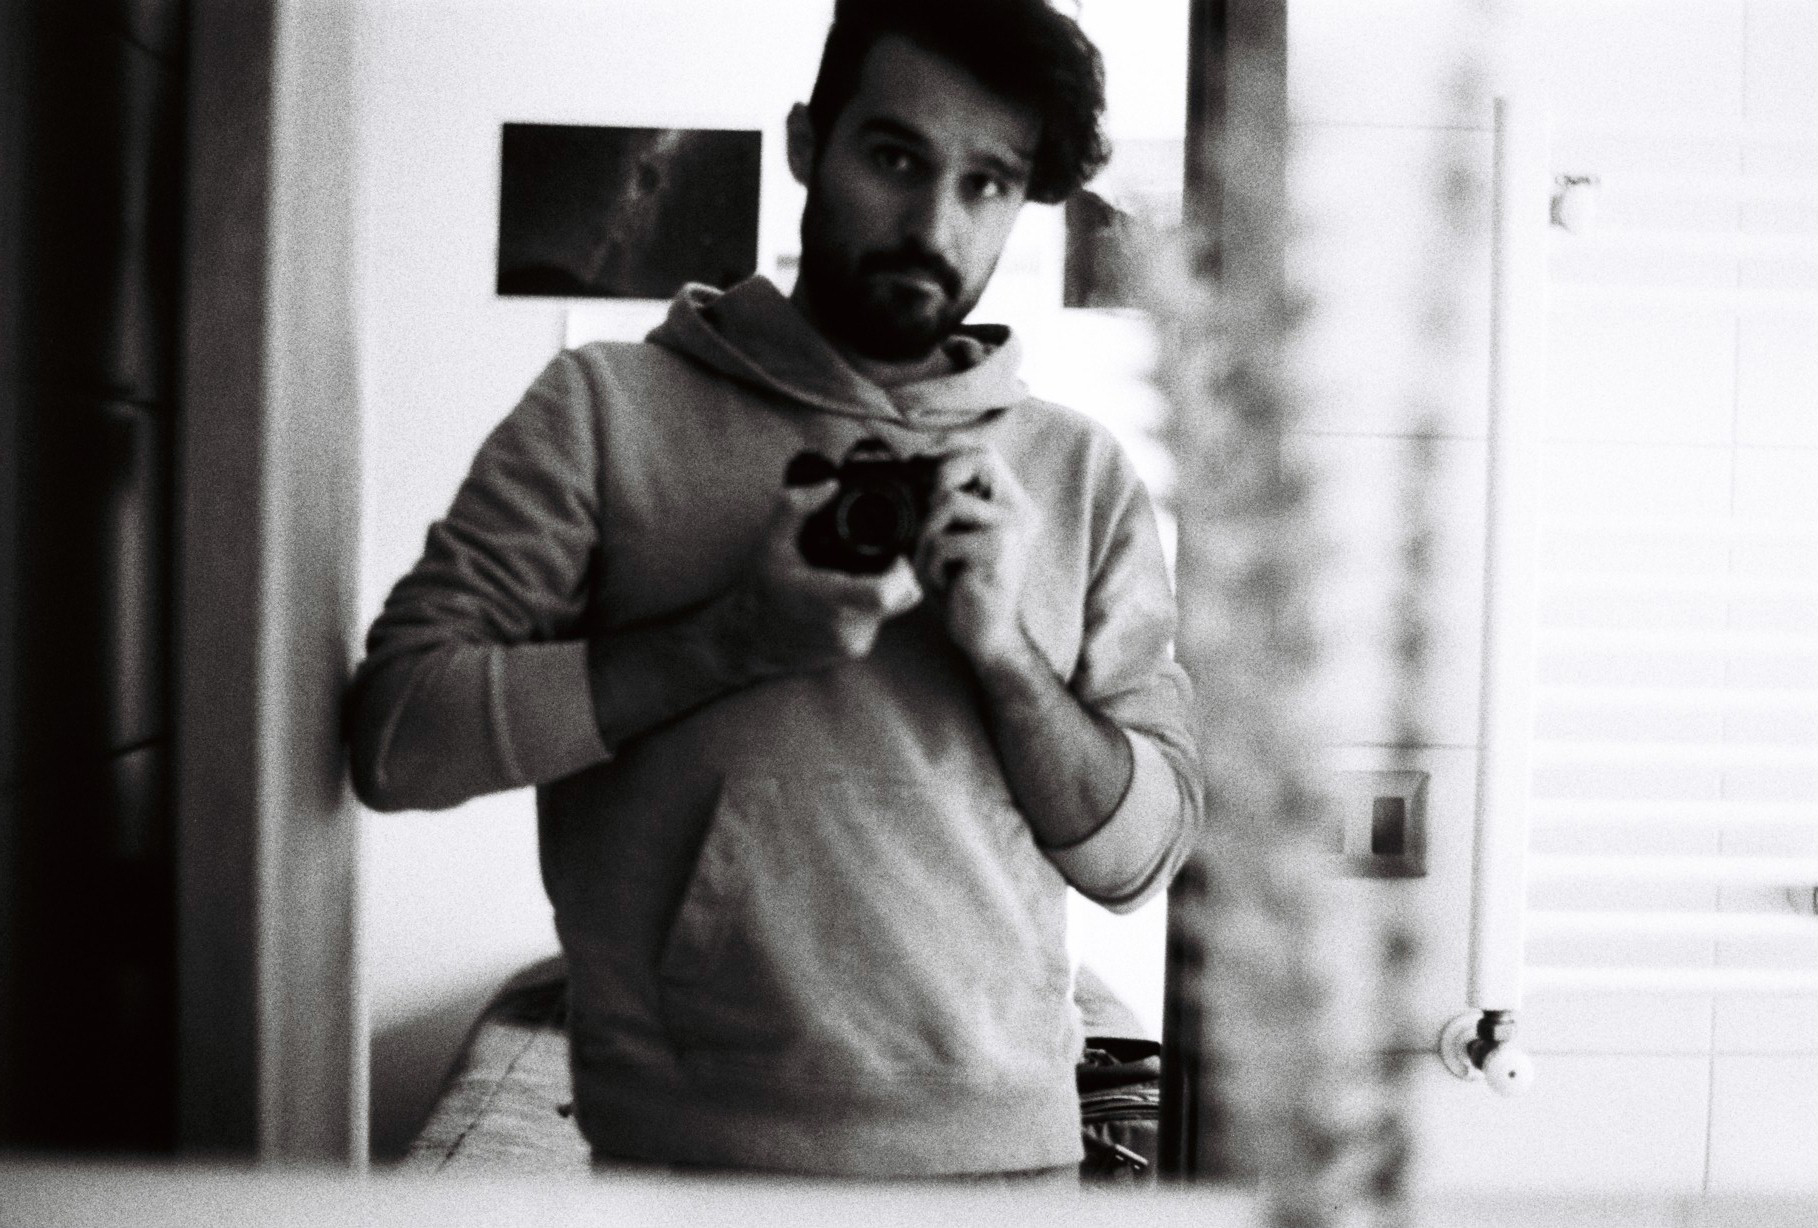
I’ve been wanting to try the “magic” of the rangefinder mechanism for some time and in my search to scratch this itch, I stumble upon the Canon P camera. As history goes, this camera was produced from 1958 to 1961 and is among the last of the rangefinder by Canon (the next one was the Canon 7). It uses the Leica threaded mount (LTM or m39) and with that is usually dubbed as a Leica copy camera. This and the Canon 7 are pretty similar to the Leica M3.
I’ve managed to grab and excellent copy for around $300 USD, clean viewfinder, clean rangefinder mechanism and the shutter curtain has no wrinkles at all. With that, a Canon LTM 50mm F1.4, for around $200 USD, with some external sign of use but optically really great.
So with that, here’s my impression and review of this “legendary” rangefinder camera that by now, it can be considered as a senior citizen.
Updates.
- October 03 2021
- Added “taking photos”.
Construction
If you’re in dire need you can bash this camera in someone head, produced a mild concussion, and surely with a little bit of cleaning you can keep taking photos with out much trouble. With that, it’s not uncomfortable at all, the weight is well distributed and it feels very sturdy in your hand.
Paired with the 50mm , the whole package it’s very compact and “pocketable”, (a big pocket indeed).
Frame lines
According to the internet, inside the viewfinder you will find parallax corrected finder for 35, 50 and 100 lenses, and that’s the case. Check the photo below to have a clue on how it looks. The viewfinder is bright and big, and the frame lines are hardly intrusive. One massive advantage is the 1:1 reproduction, that means that you can compose the scene with “both” eyes, although it requires a little practice. In comparison to an SLR viewfinder, I find it more comfortable to use and I can nail the focus with more ease.

Focusing mechanism
Overall view


Loading film
Loading and unloading film is kind of familiar if you have done it in another analog camera. Check the video below for an in depth look.
Lens
Check the review of the Canon 50mm F/1.4 LTM


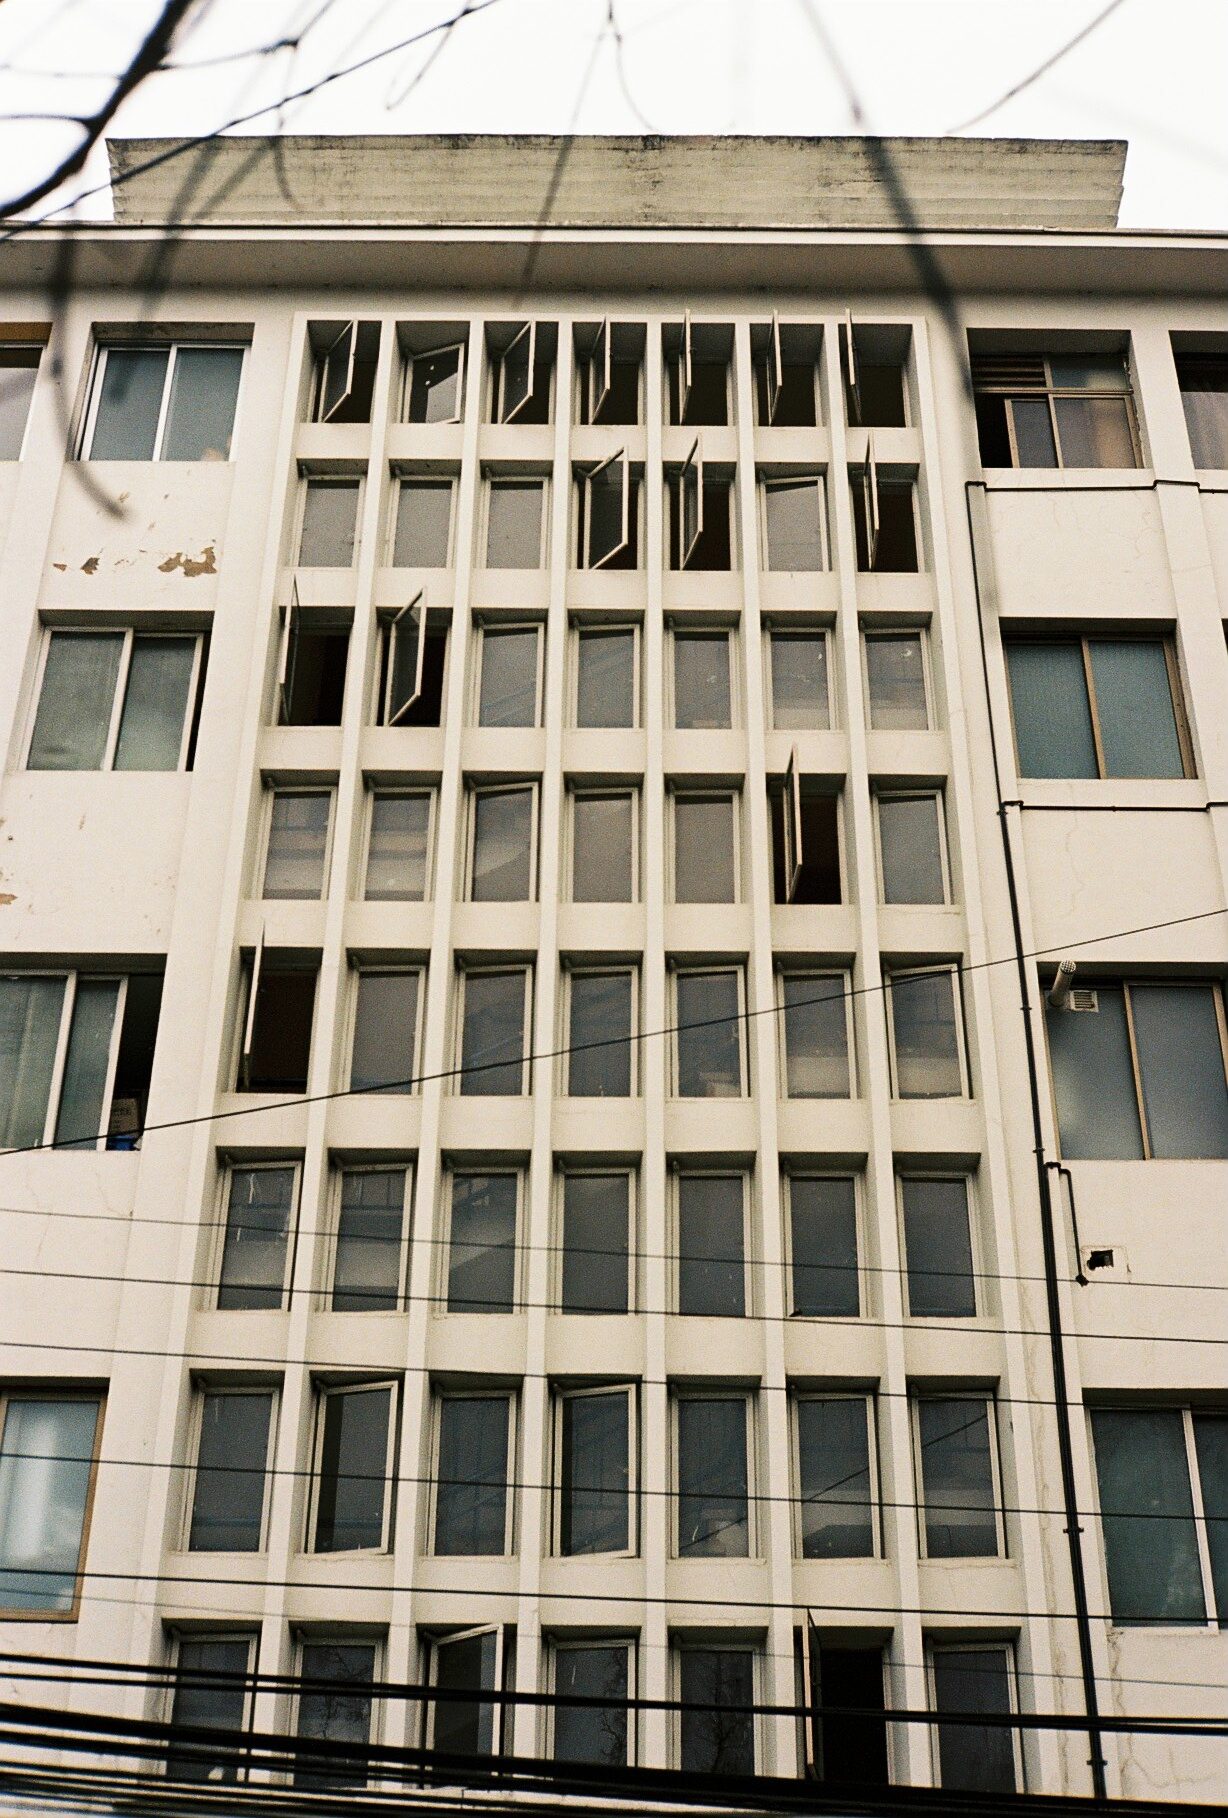
Taking photos
Being completely mechanical, it does not have a light meter of any sort. You could attach external ones and have that sorted out, but with out this you have to rely on other methods. You could rely on the sunny 16 rule to taking photos, but nowadays an smartphone app is your best tool to correctly expose a photo. Besides that, takes a little time to get used to the frame lines in the viewfinder, but then they take a backseat and you forgot about them. I like the shutter sound of the metallic curtains, the feeling of the knob and the winder mechanism. Although this last items are somewhat dependent of the state of your camera, they make the overall experience of taking a photo, more enjoyable.
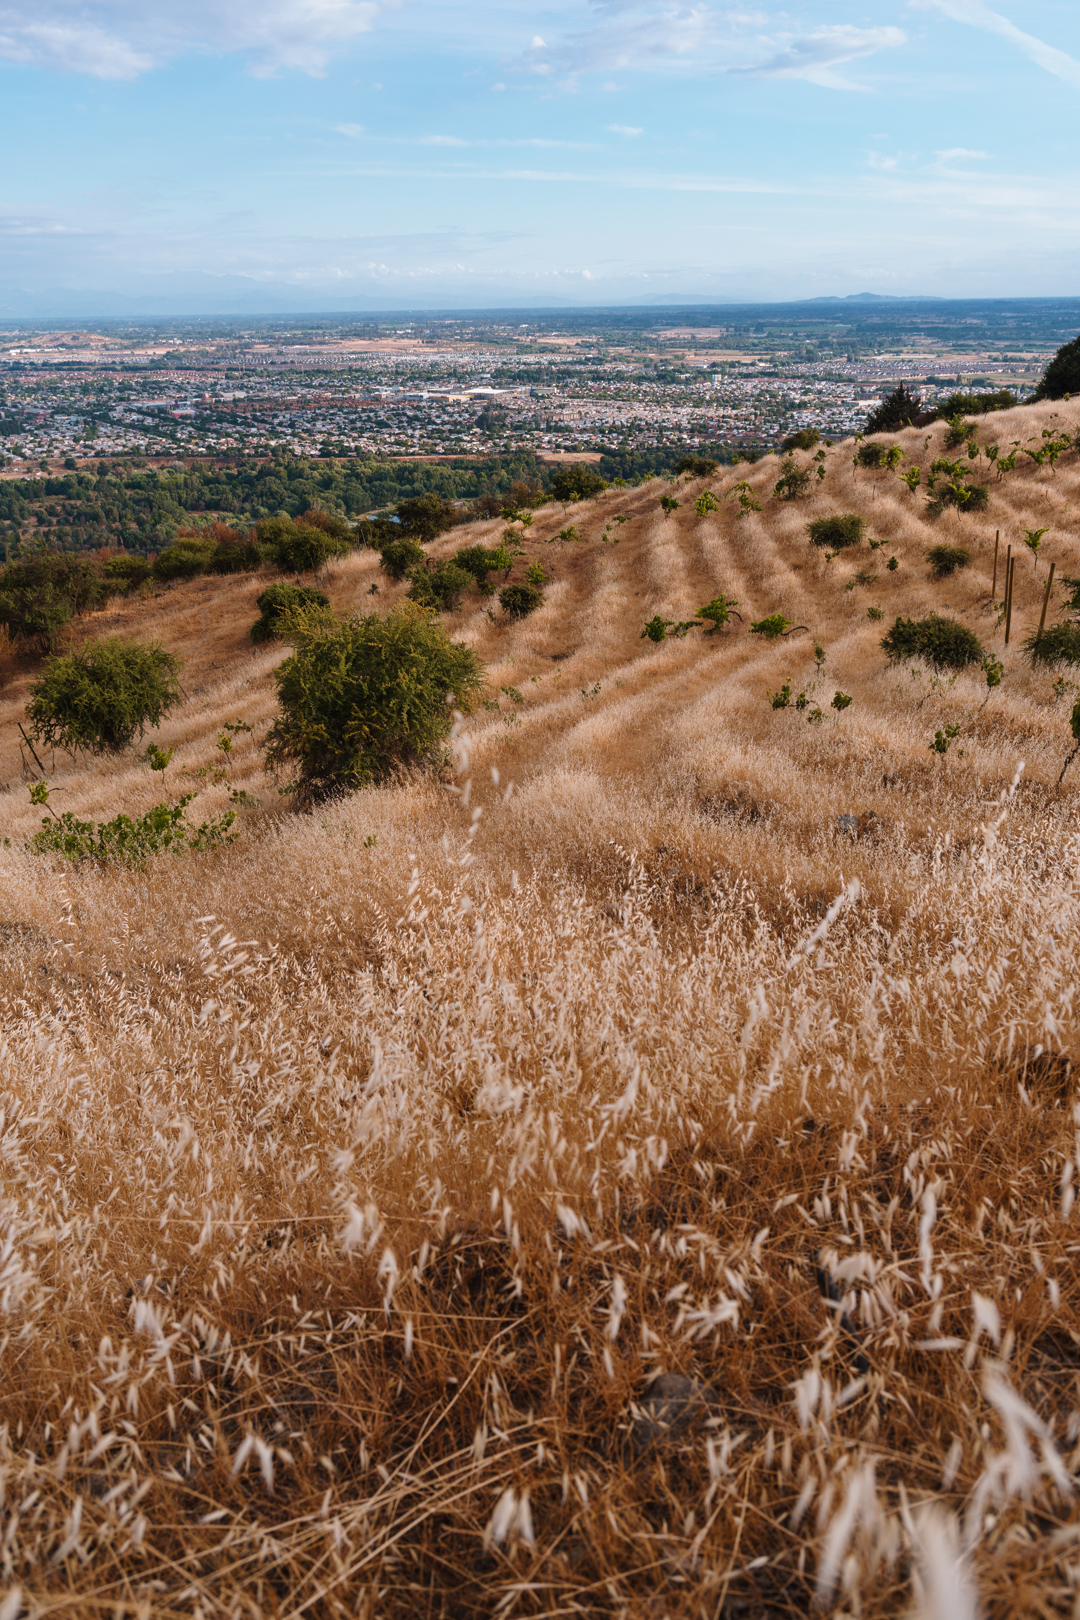
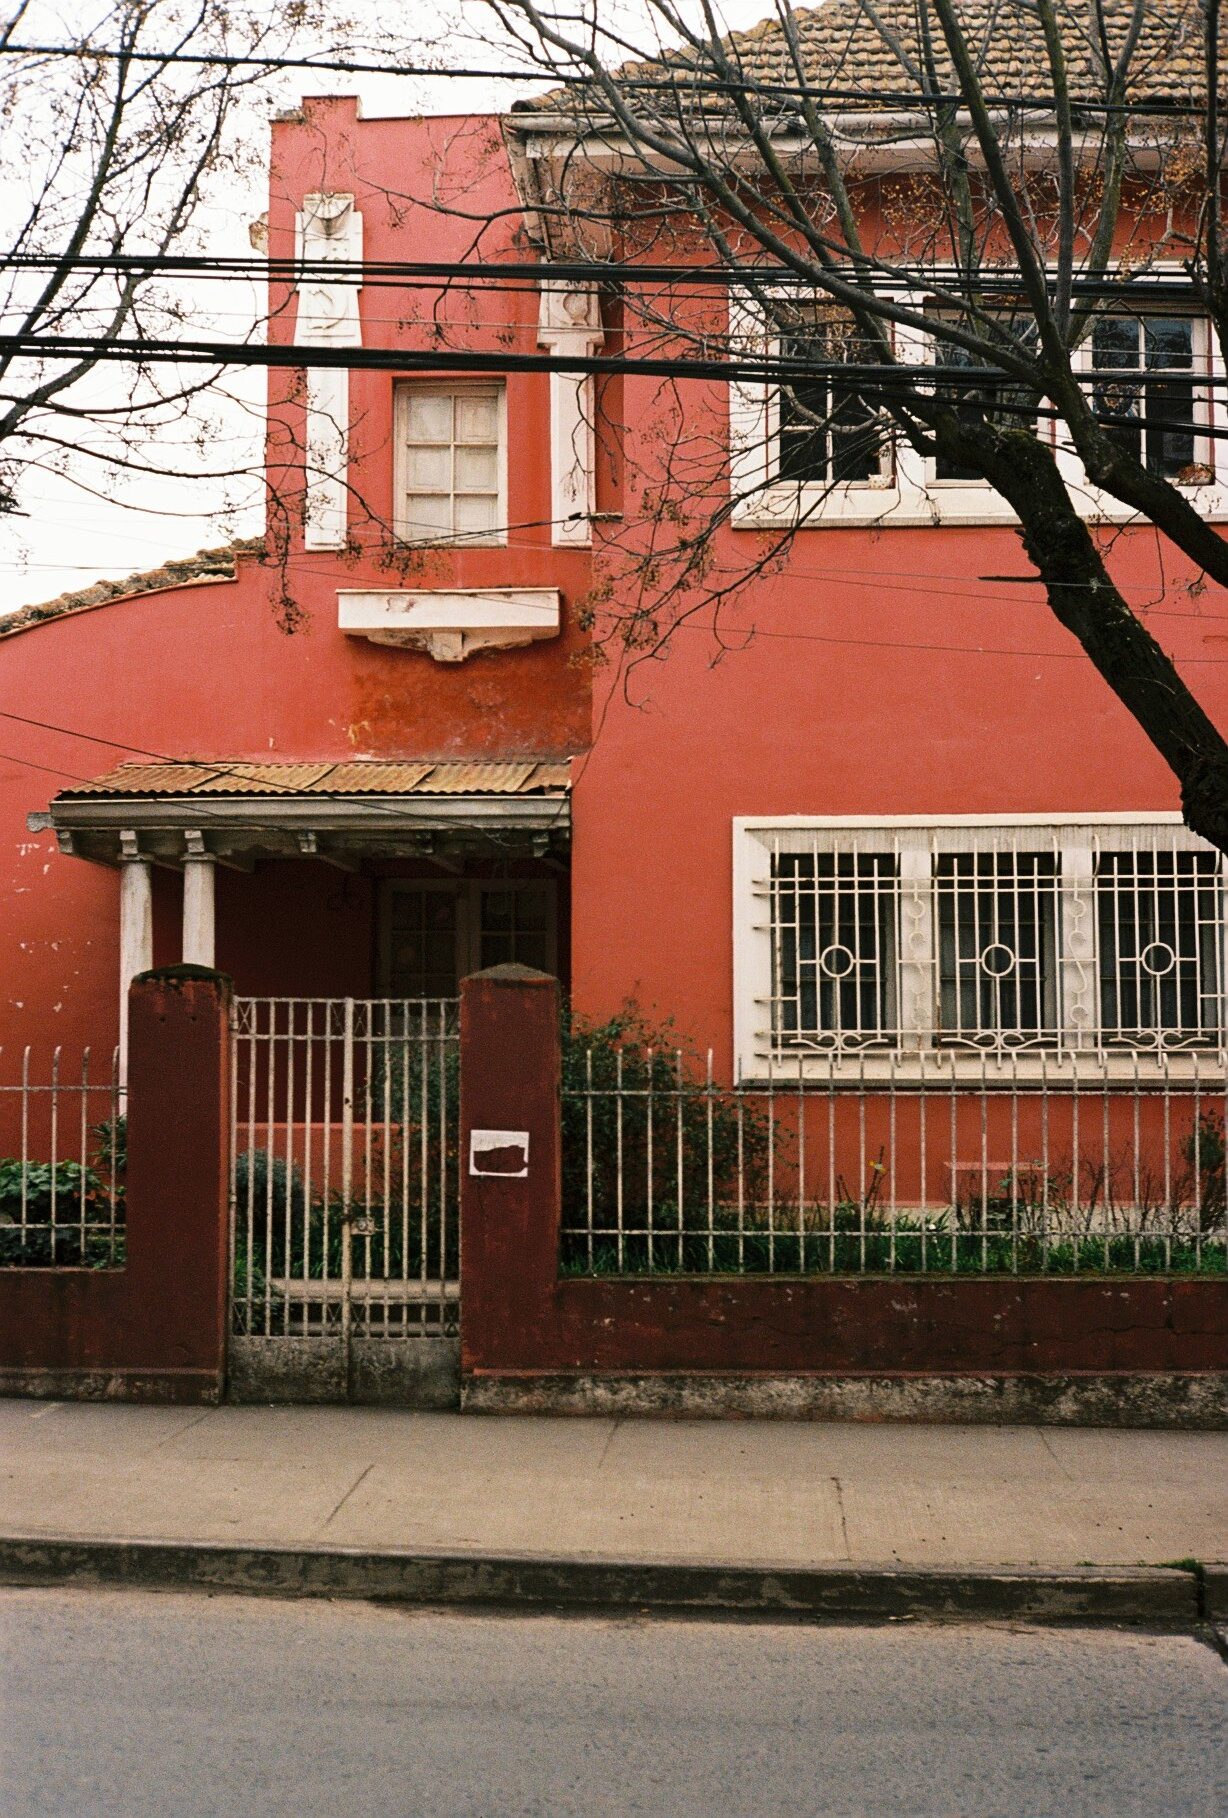
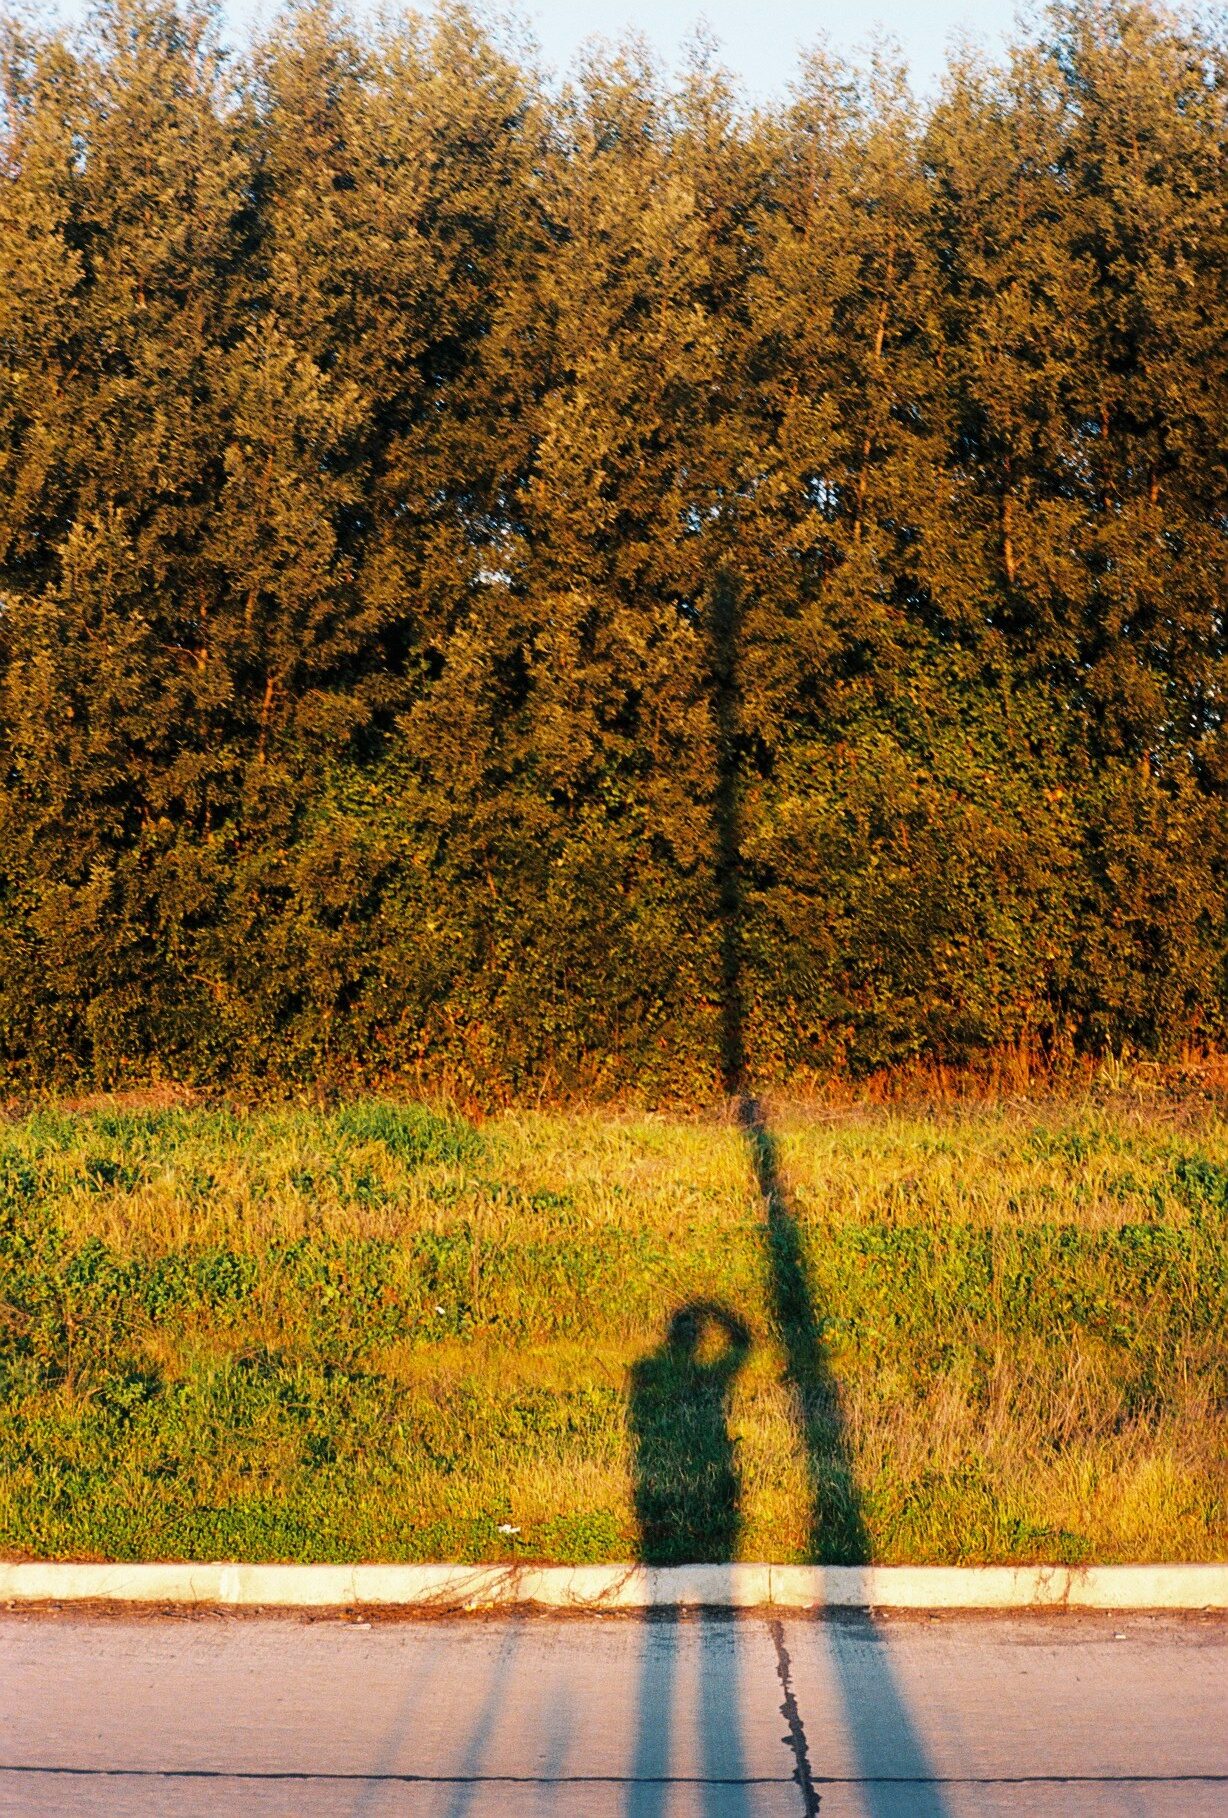
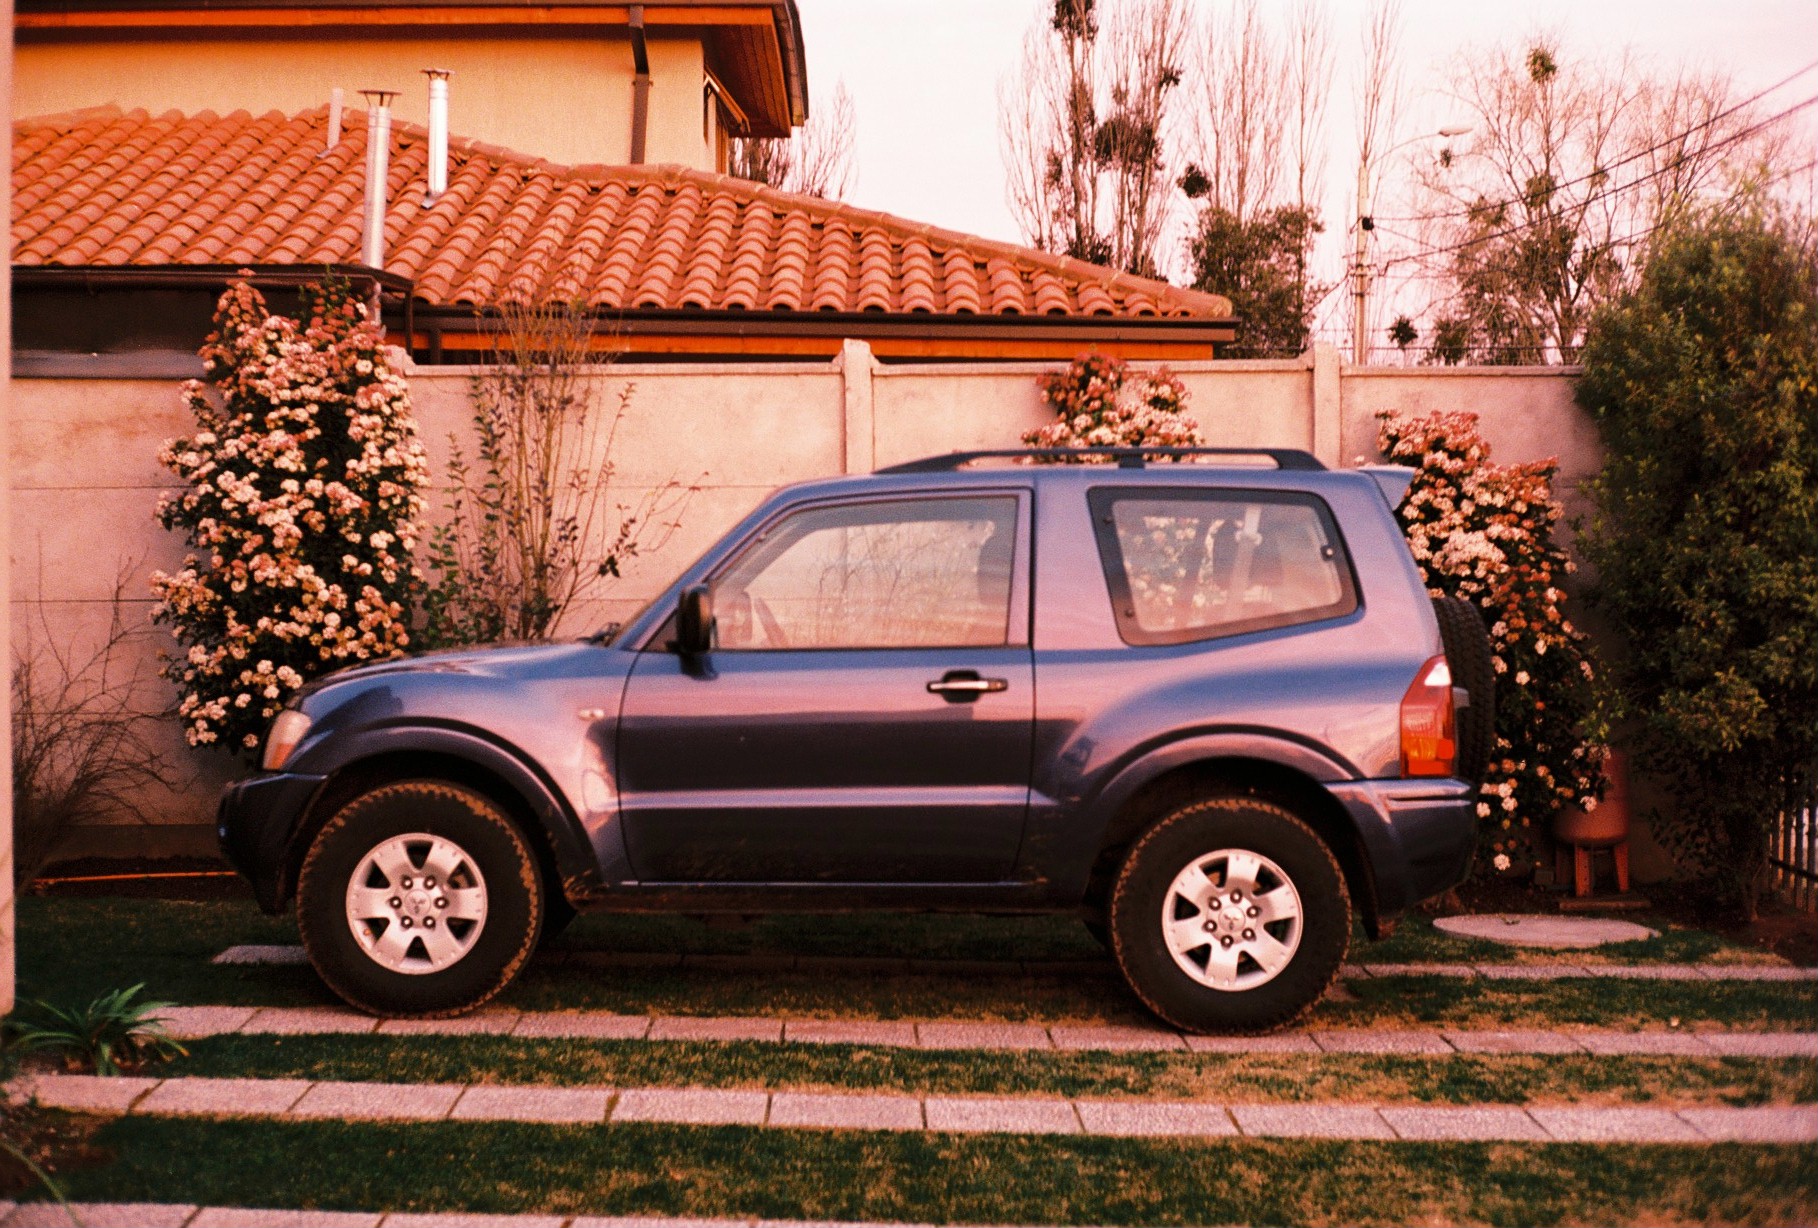
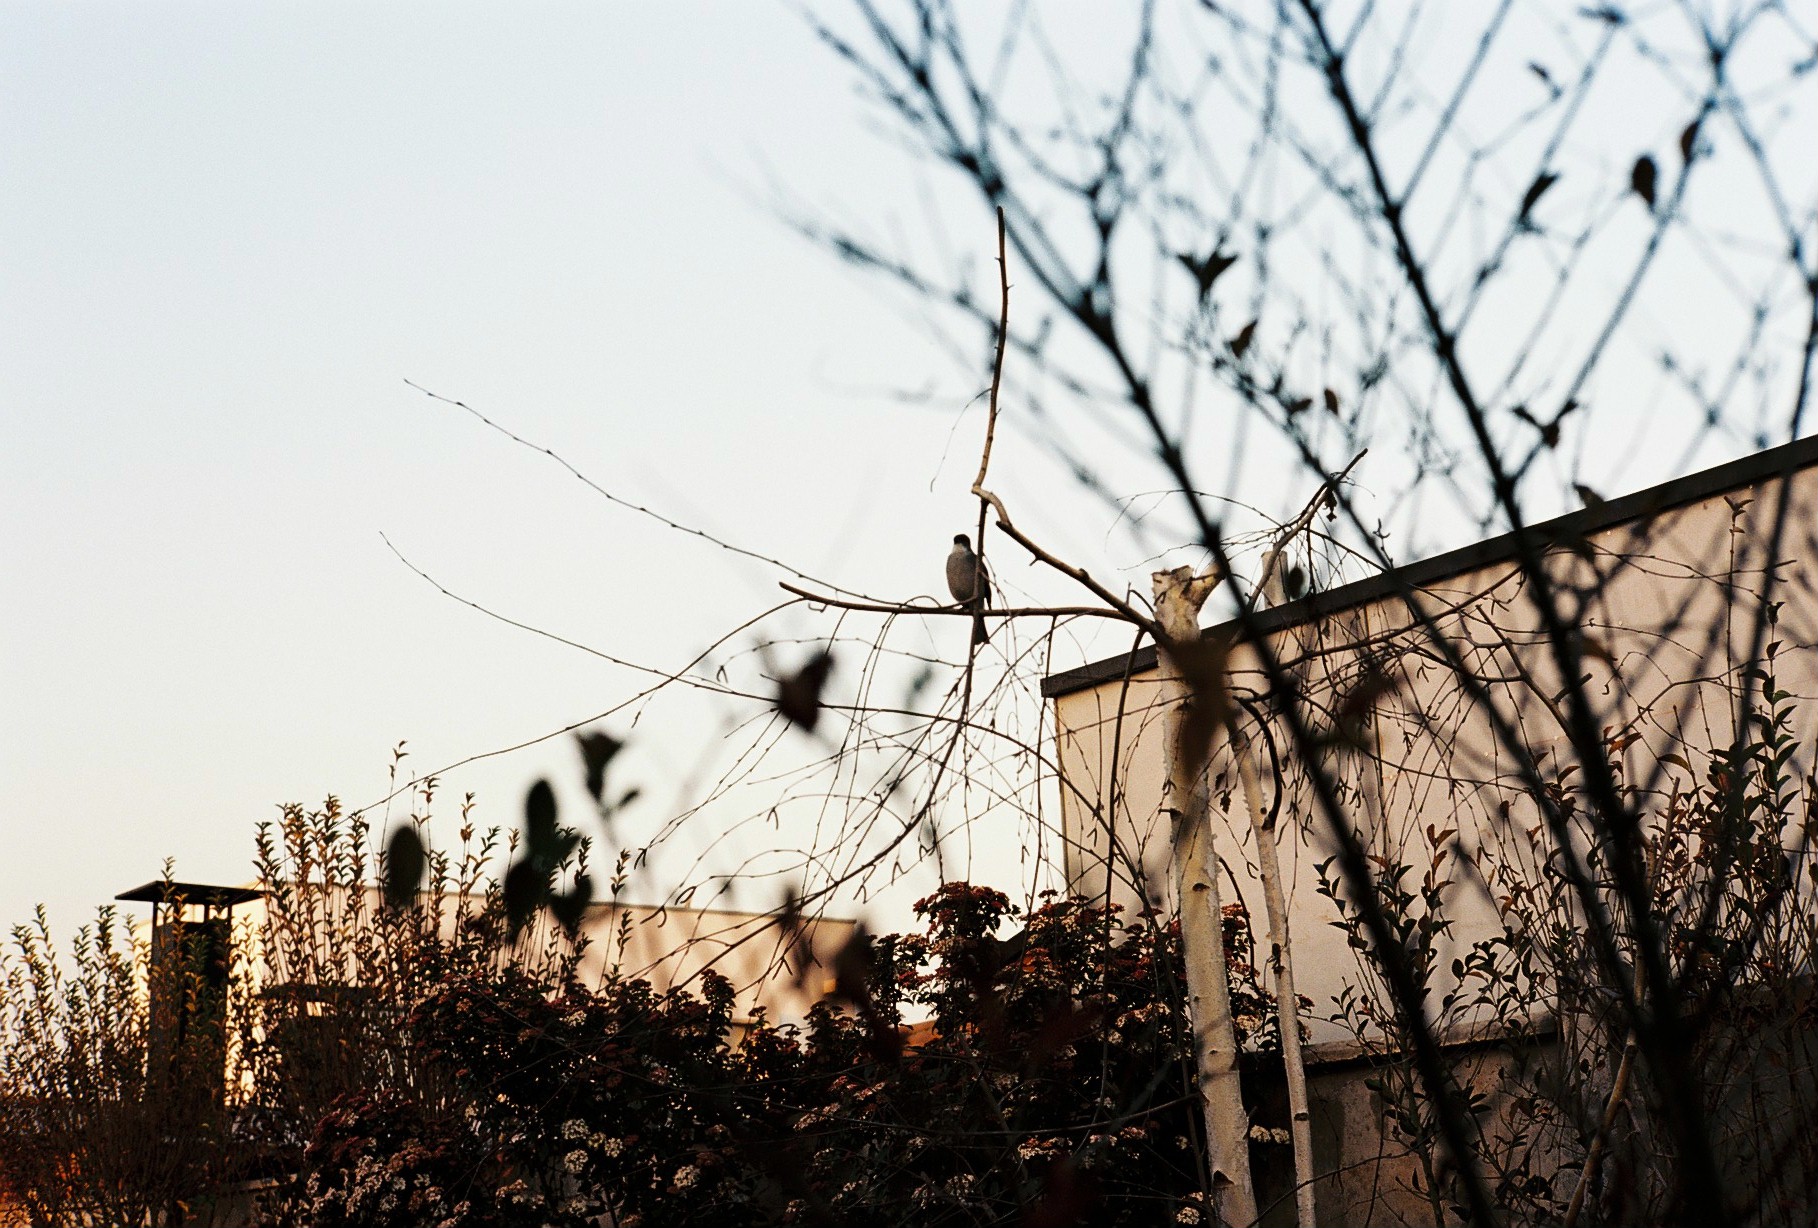
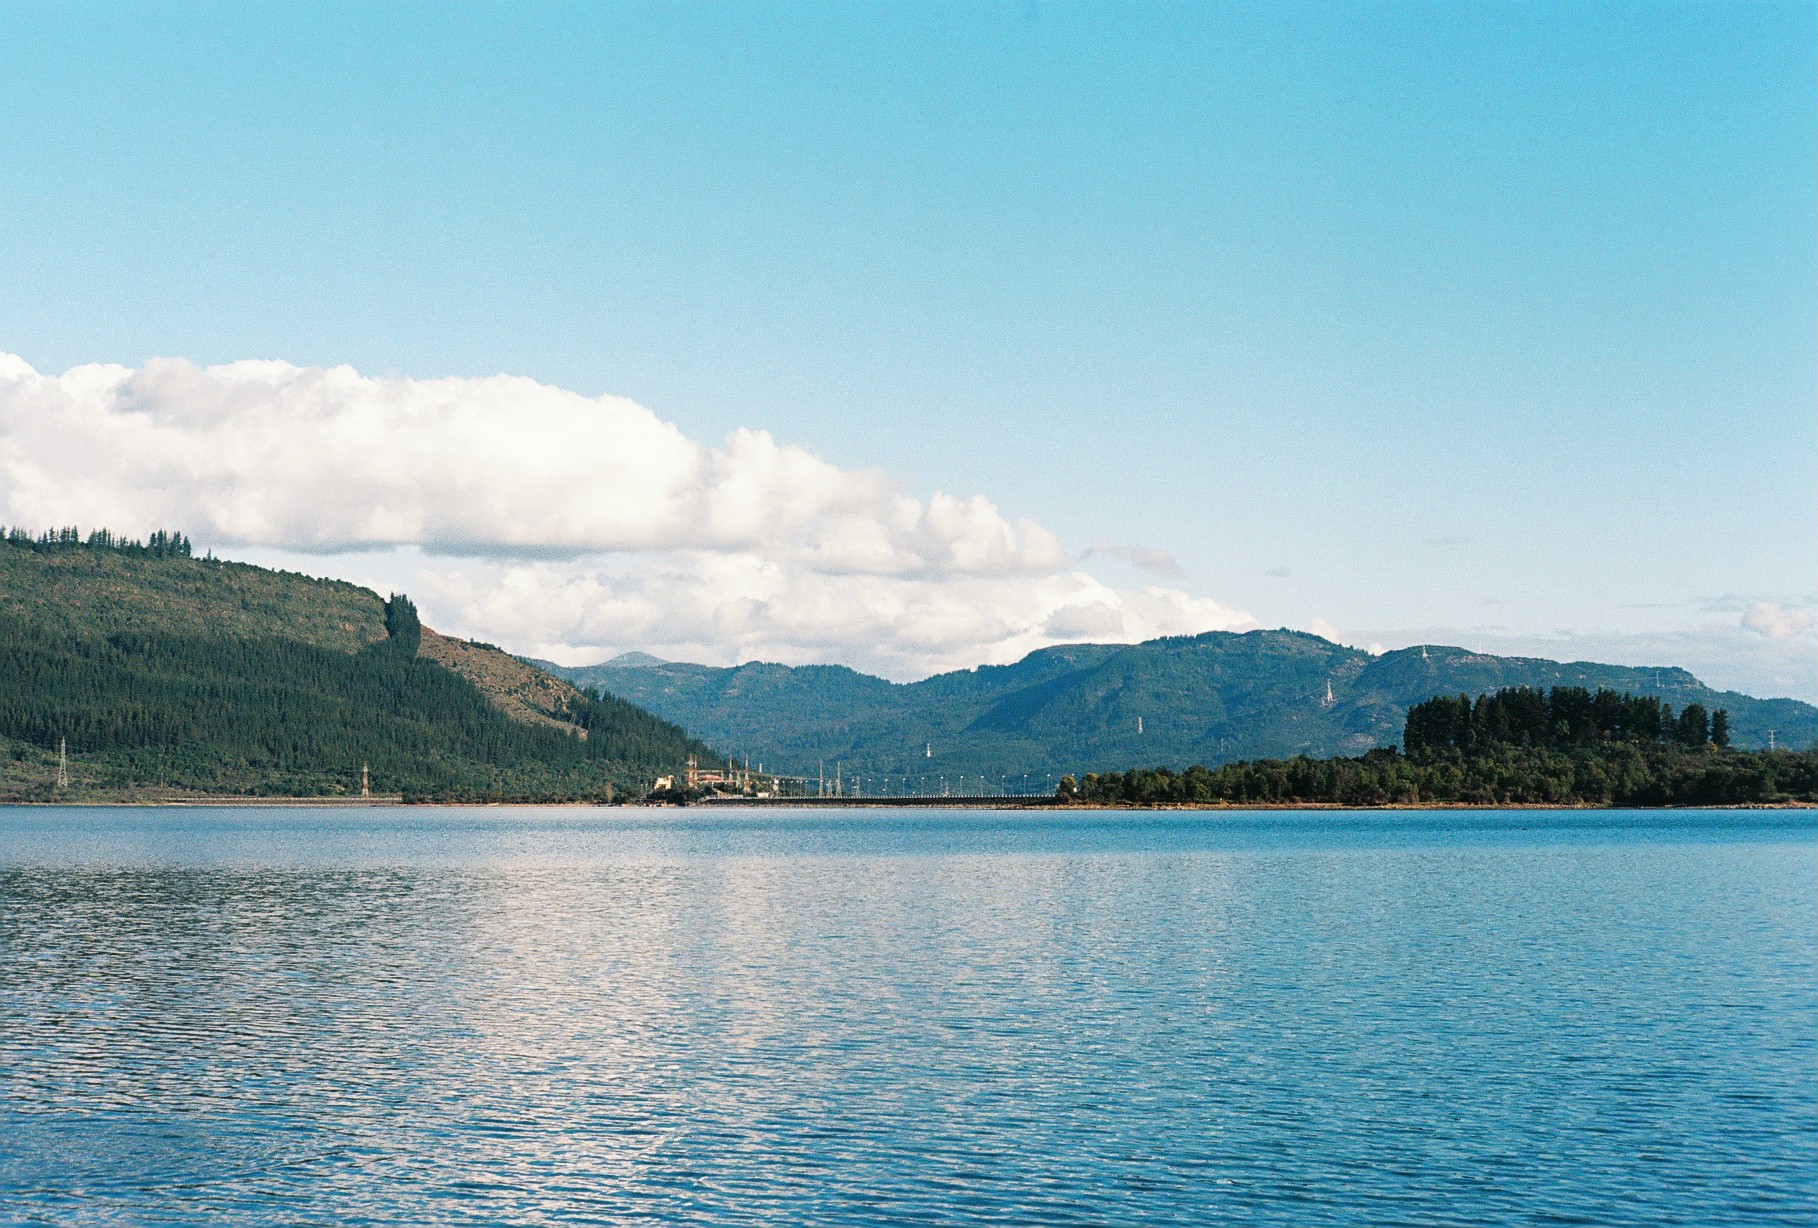
Gallery


Conclusion
Considering that it has over 60 years old, it’s build like a tank and can enable you to do photography in the most basic (and useful) form, I think this camera is a must have for any photographer that want to hone the basic skills of a photographer or re-kindle the feel of awe that occurs when the shutter is pressed and the final photo awaits in the chamber, before reaching your eyes.
The bigger challenge lies in the rangefinder mechanism, that has a learning curve that feels really good when you surpass it. As you have access to a 1 to 1 reproduction of the scene, is somewhat easy to prepare the photo before hand and you quickly learn to select and focus your subject almost by feel. With this you’re forced to think your photo, to commit to it before pressing the shutter, but this enables a better ratio of good photos overall (I think).
Anyway, taking in consideration that your buying a camera to be used in the most basic form of photography, this is a really great choice that wont disappoint.
Cako
Get one
Support the blog!

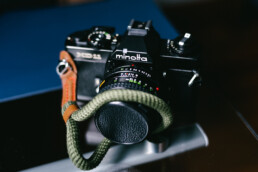
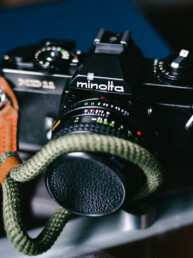
Minolta XD11 - SLR Film camera
Cako
Characteristics
- Film Type: 35 mm
- Lens Mount: Minolta MD Bayonet
- Viewfinder: Fixed SLR Pentaprism with full information display and LED aperture scale readout
- Shutter: Vertically Traveling Metal Blade
- Speeds (Manual): X, B, 1 – 1/1000 seconds, plus 1/100 mechanical “O-speed”
- Speeds (Automatic): 1 – 1/1000 seconds, step less
- Exposure Meter: TTL Silicon Photo Cell with Aperture and Shutter Priority Automatic Exposure
- Battery: (2x) 1.5v LR44 Silver Oxide Battery
- Flash Mount: Hot shoe with PC-sync port for flashbulbs, 1/100 X-sync
- Weight: 569 grams - body only
Manual
Introduction
There’s for sure a different feeling when handling a analog camera. The direct visual input, loading the the film, the learning curve of how light and camera work together, and the wait for the final product. This and much more is interlaced at the moment of pressing the shutter.
The Minolta XD11 is a more “modern” SLR, having a integrated light meter and different shooting modes, that can be very helpful for beginners. This requires the use of batteries but if they are not available, the camera can be used in full manual mode.
In this post, we’re going to dive into the camera, check images produced by it and dive deeper into the feeling of shooting analog.
Construction
Metal (aluminium?) and plastic are the main components of the XD11. It feels very sturdy when holding it and surely can withstand some abuse.
- In the front of the camera you have access to the timer (delayed action lever), and the minimum aperture lever (dependent of the lens).
- Also there’s the depth of field preview, the X-SYNC flashcord terminal and the lens latch.
- On top you have access to the exposure compensation and film speed dial.
- Also, there’s a film-speed lock. For avoiding casual movement of the dial.
- There’s the model selector in conjunction with the shutter speed knob.
- The modes are (M)anual, (A)perture priorty, (S)hutter speed priority.
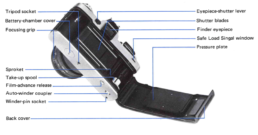
- In the back of the camera you have the Finder Eyepiece
- And a quirky little feature, that’s the eyepiece-shutter lever.
- This can block the light from the Eyepiece. Especially useful when using Bulb mode, or long exposures.
Depending on the condition of your camera, this parts should work with out problem. They are easy to operate and offer minimum resistance.
In my camera, the shutter counter, doesn’t advance when you take a photo. But, the roll advance indicator does.


Handling
The handling of the camera is really nice, the button layout is very intuitive and you can learn it in a couple of uses. I think the weight of the camera is not an issue, but it really depends with what lens you pair it. I’ve tested only with the 50mm f1.4 and It’s borderline portable. I think that with the 45mm f2 (pancake lens) could be a lot more portable.
Viewfinder
One of the main advantages of this viewfinder, is that indicates the proposed aperture or shutter speed according to the selected mode. In manual mode, the shutter speed is displayed.

Name of parts
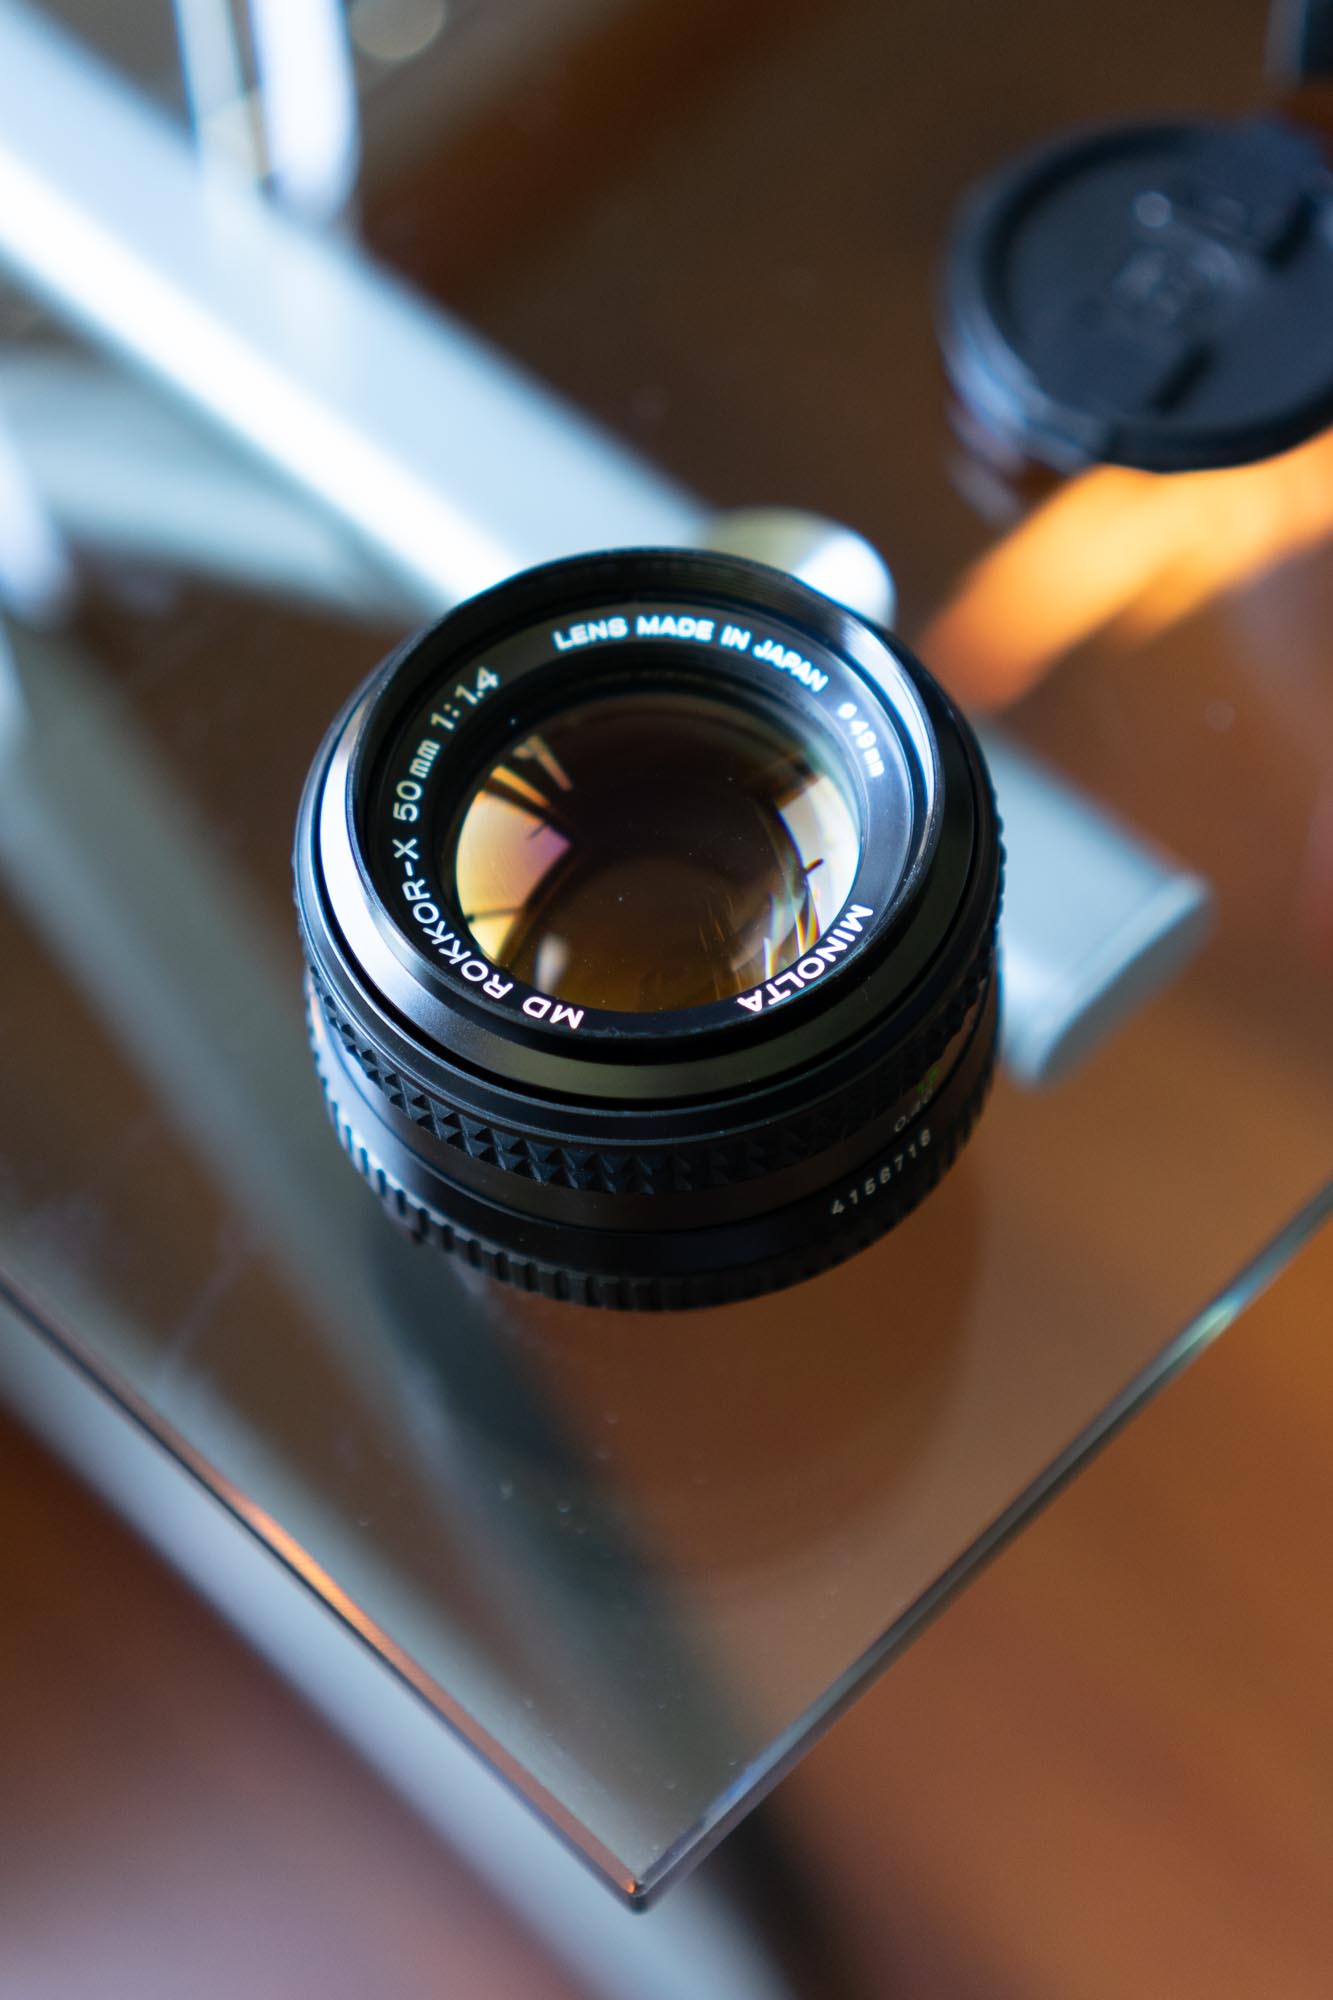
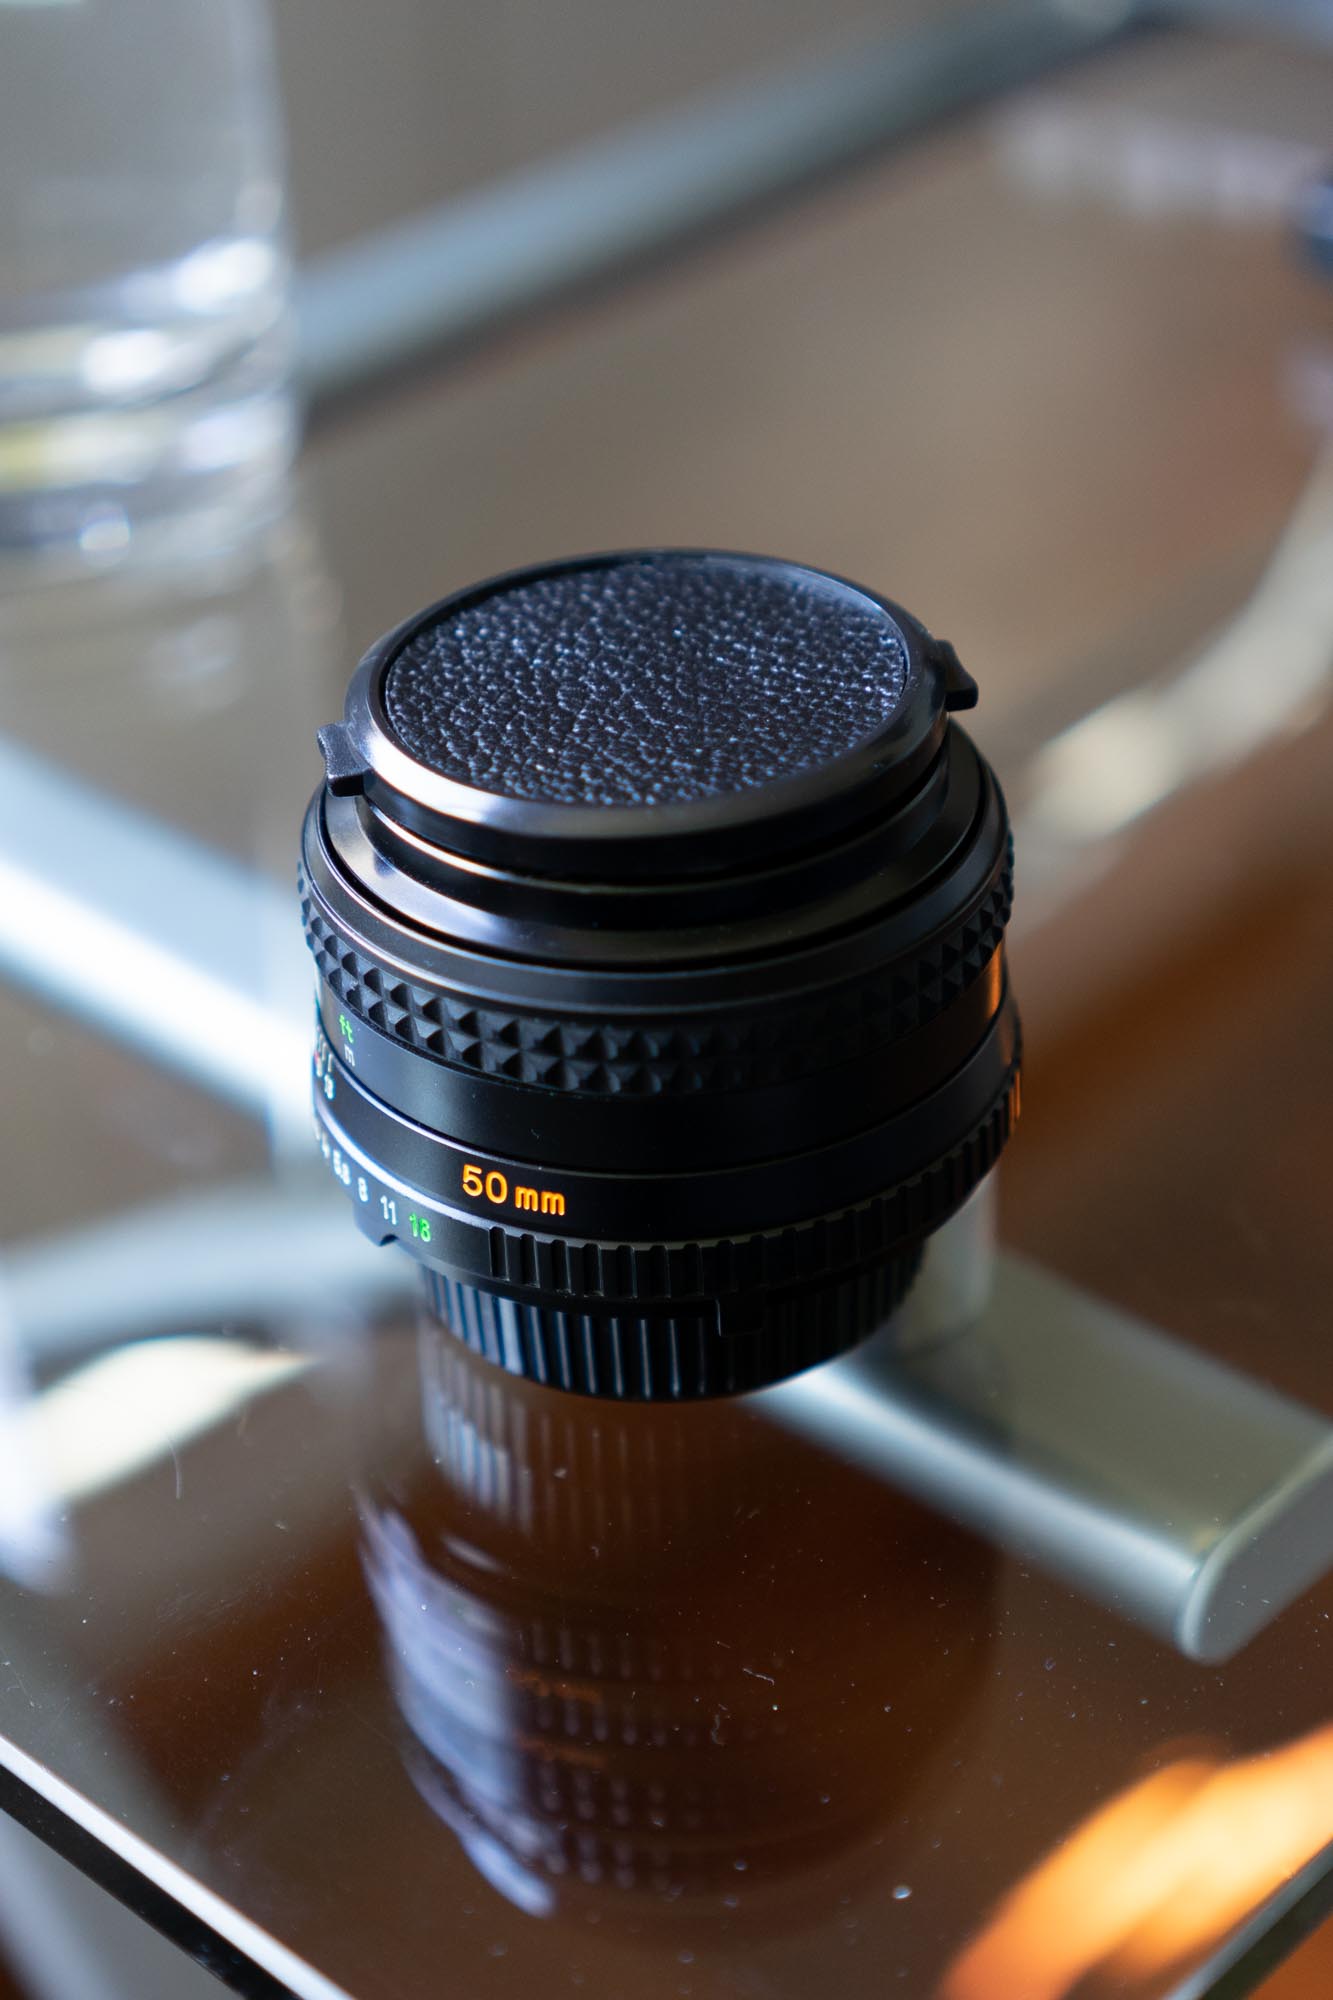
Lens
This camera was used with the Minolta MD 50mm F1.4. Check the review here.
Taking photos
This camera is a great point (focus) and shoot camera, in any of the automatic modes. Or an excellent SLR when used in fully manual mode. Given that you take the time to know how and when to use any of the aforementioned modes, you can end up with a lot of keepers and the end of a roll.
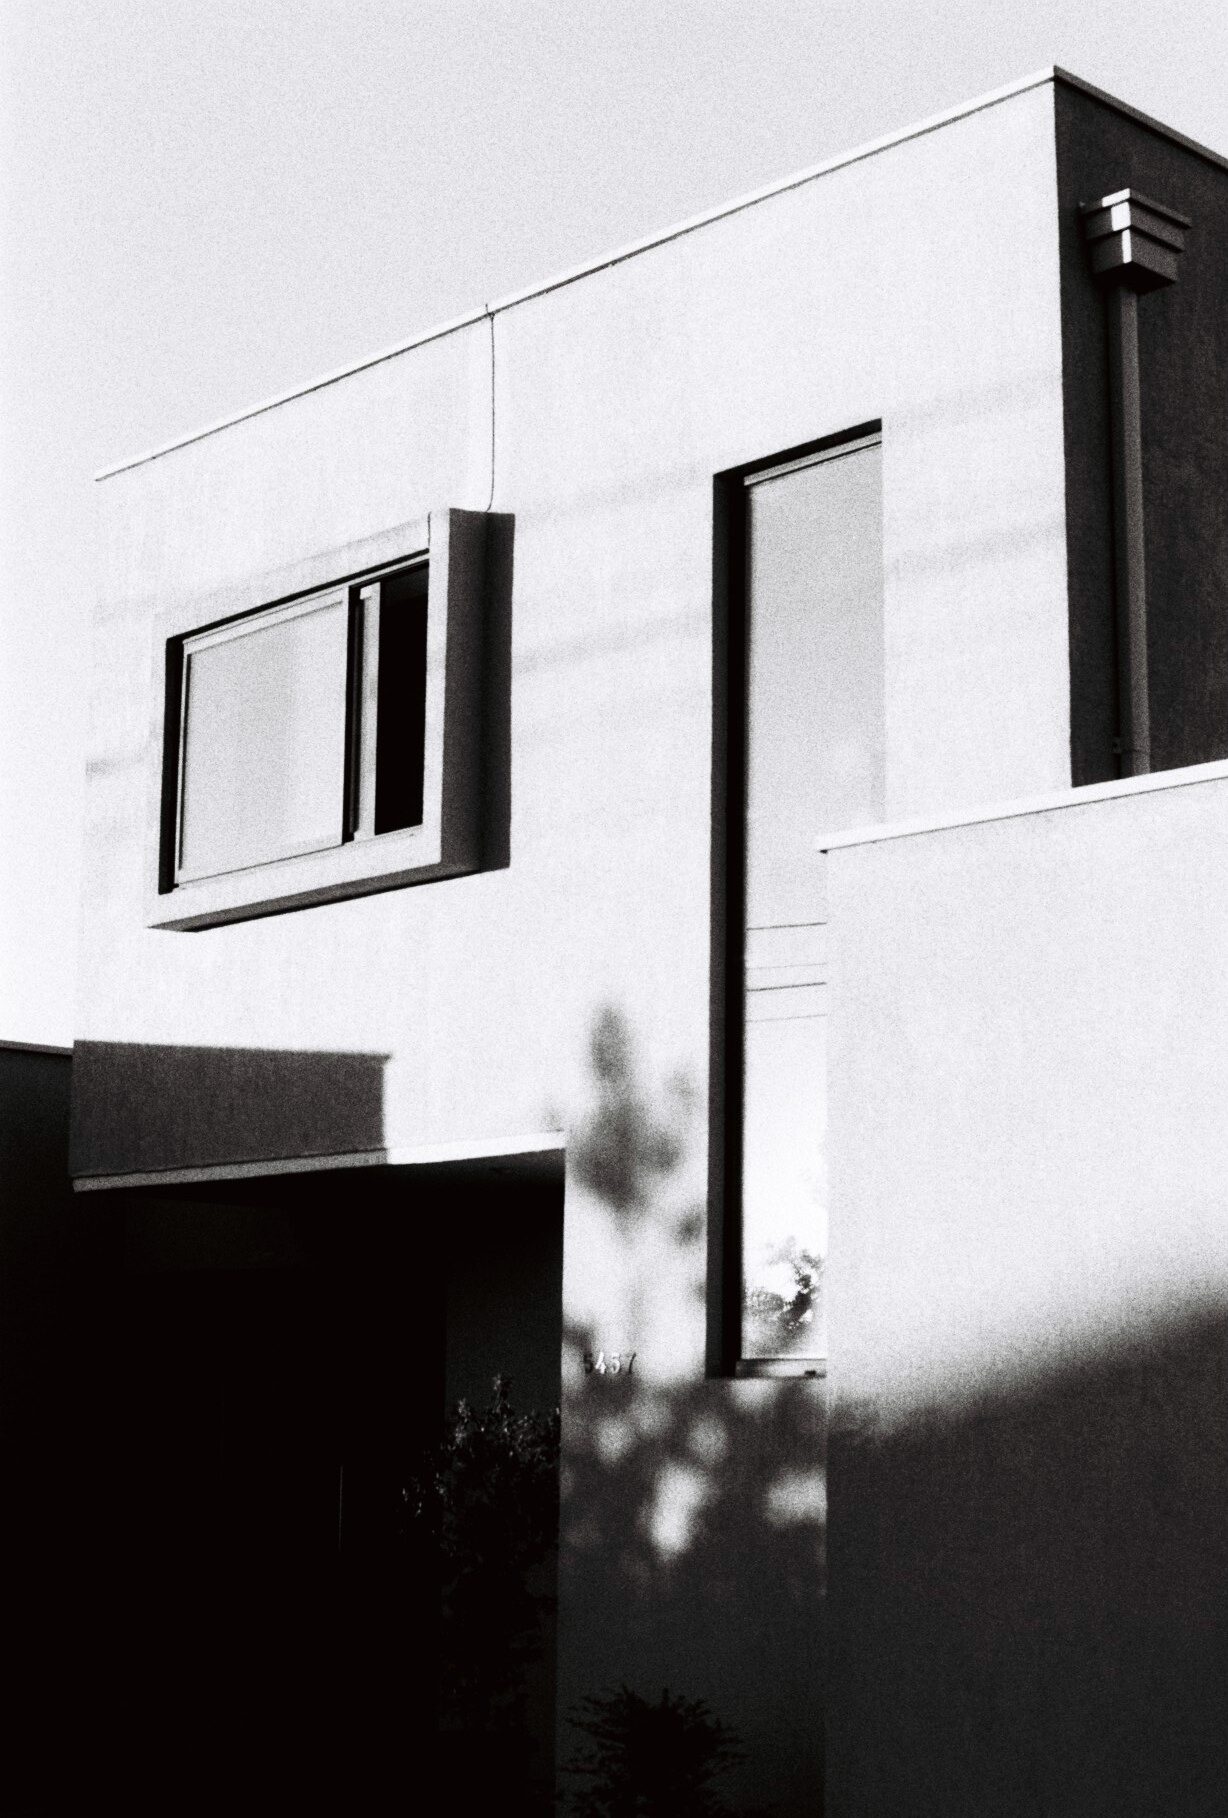
Gallery
Here’s a roll of black and white film (Fomapan 100). There’s a little bit of everything here, a test roll of some sort, testing the automatic modes as well as the manual mode in all kind of apertures and speeds.


Conclusions
I really think this camera is a perfect “entry” way to the world of analog photography. It offers so much and with little knowledge you can get some excellent results. The name “Minolta” implies a reputation of good quality and a history behind it (also, continue after the acquisition by Konica). The lenses and the cameras have demonstrated that they can handle the pass of time, and still be a rival to the modern counterparts in important categories such as image quality.
In the end, it must be clear that the camera is one more tool. As tools, is up to us to use them as we want to achieve what we need to express, and if they can facilitate the process, the better. With this in mind, this camera is an easy option to consider and to evolve around it as artist.
Get one
Support the blog!
7Artisans 28mm F/1.4 FE-Plus - Review
Cako

Characteristics
- Lens Mount: Leica - M
- Type: Prime lens
- Focusing: Manual
- Construction:
- Lens Groups: 11
- Lens Element: 9
- Aperture Blades: 13
- Rounded
- Min. Aperture: 1.4
- Max Aperture: 16
- Min. Focal distance: 0.7 m
- Filter Size: 52 mm
- Length: 69 mm
- Weight: 490 gr
- Hood: Yes, not included in the retail package
- Price (new): USD 436 / May - 2021
Introduction
As far as lenses go, 7artisans had a reputation for making affordable lenses that feel good when they are in use, but when you take a look at the images you might found surprises regarding the image quality. Mainly in the corners, or getting too much artifacts at different apertures. I say had, because that’s not entirely the case with some of their more expensive (but affordable in comparison) glasses.
7artisans produce lenses for several camera systems, taking advantage of the mirrorless cameras of today, and with that they have been gaining reputation among the enthusiast. But, how about the quality of the images? Let try to answers that in this review.
Tested on a Sony α7II and α7C
- 24 mp sensors.
- IBIS activated.
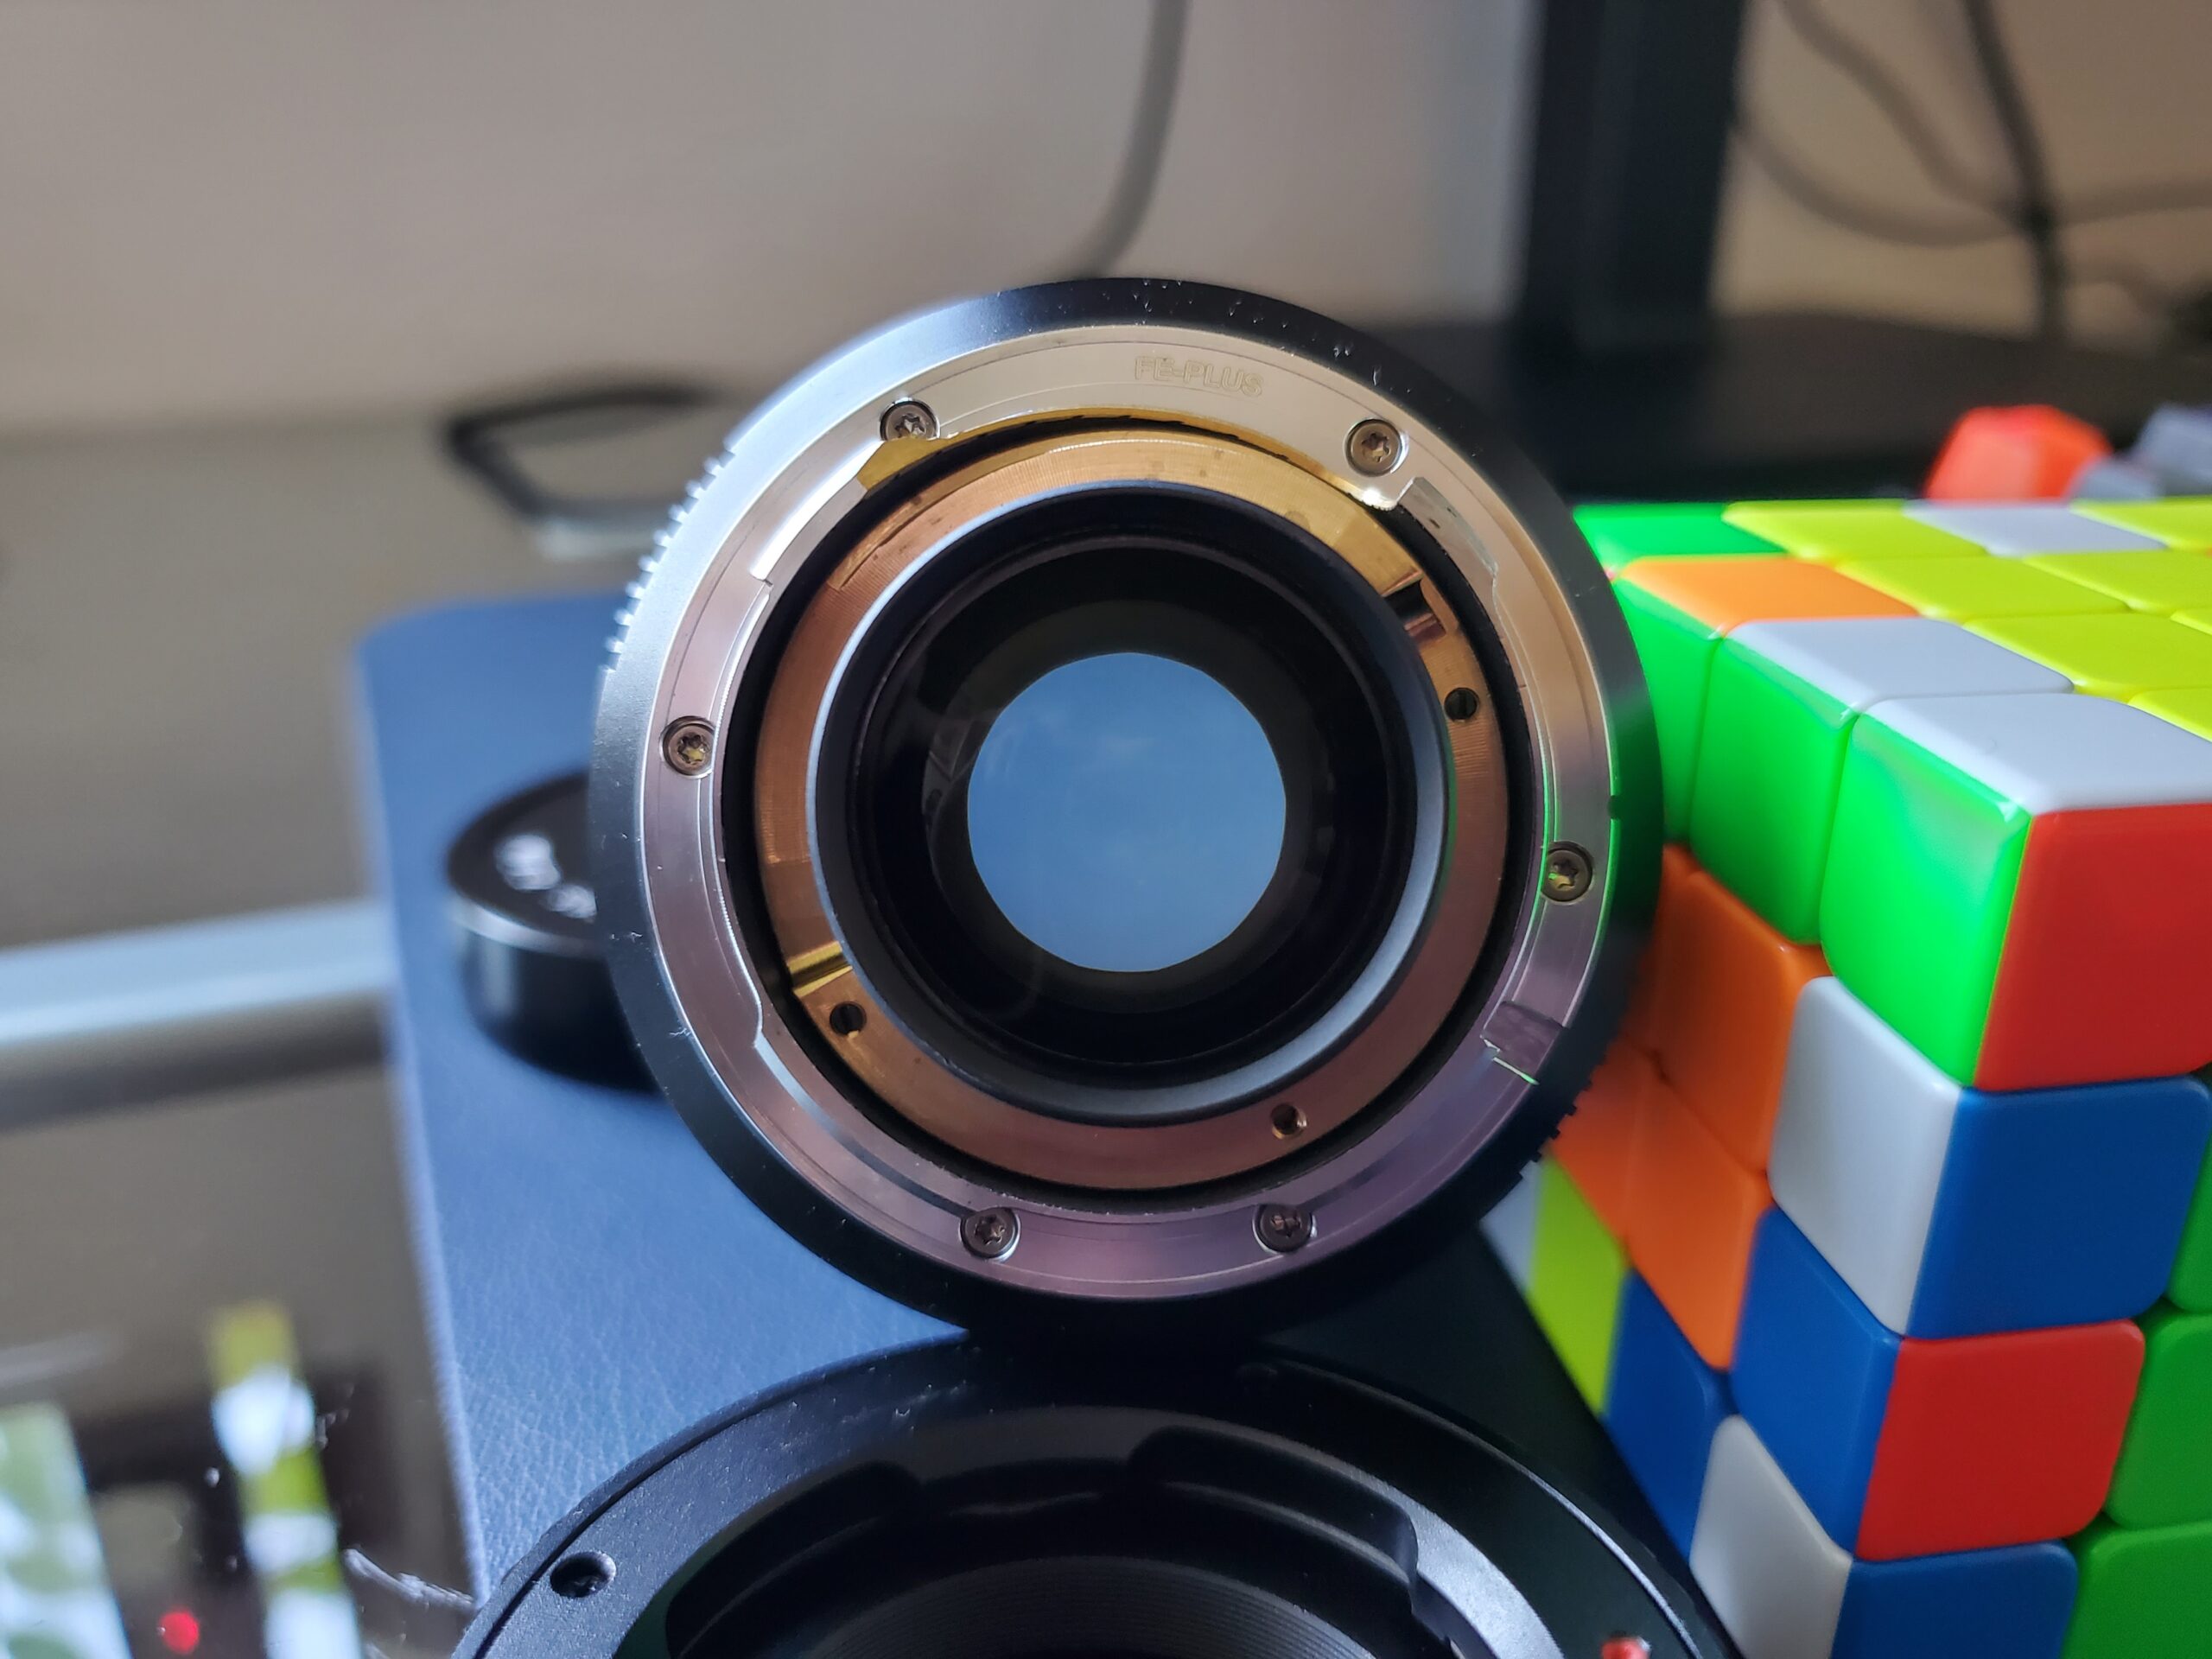
Construction
With a metal and brass construction, this lens is heavy but has a nice feeling when it’s being held. The almost 500 gr are well distributed along the cylindrical shape of the lens and overall feels sturdy and well built, as lenses that cost a lot more. Regarding the aperture selection, it has little to no play and has a really nice tactile feeling when you change it (check the video below). Although I have read that in some copies the opening ring may be a little looser than usual.
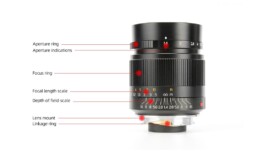
The lens has a nice and big focus wheel, that allows a precise focus that’s really needed in higher apertures. It has a distance markings (engraved) in meters and feet, coupled with the hyperfocal distance for each aperture (You use the hyperfocal distance scale to know which parts of your image will be in focus at different aperture settings).
Overall, the construction of this lens surpass what one may think of it by only looking the price tag. It has withstood months of used with no sing of loose parts or any other degradation. Really recommended.
Versions
There are two versions of this lens, the FE-PLUS and the “normal” one.
- FE-PLUS: Adjusted for the filter stack on the sensor of Sony cameras.
- Normal: Adjusted for Leica cameras.
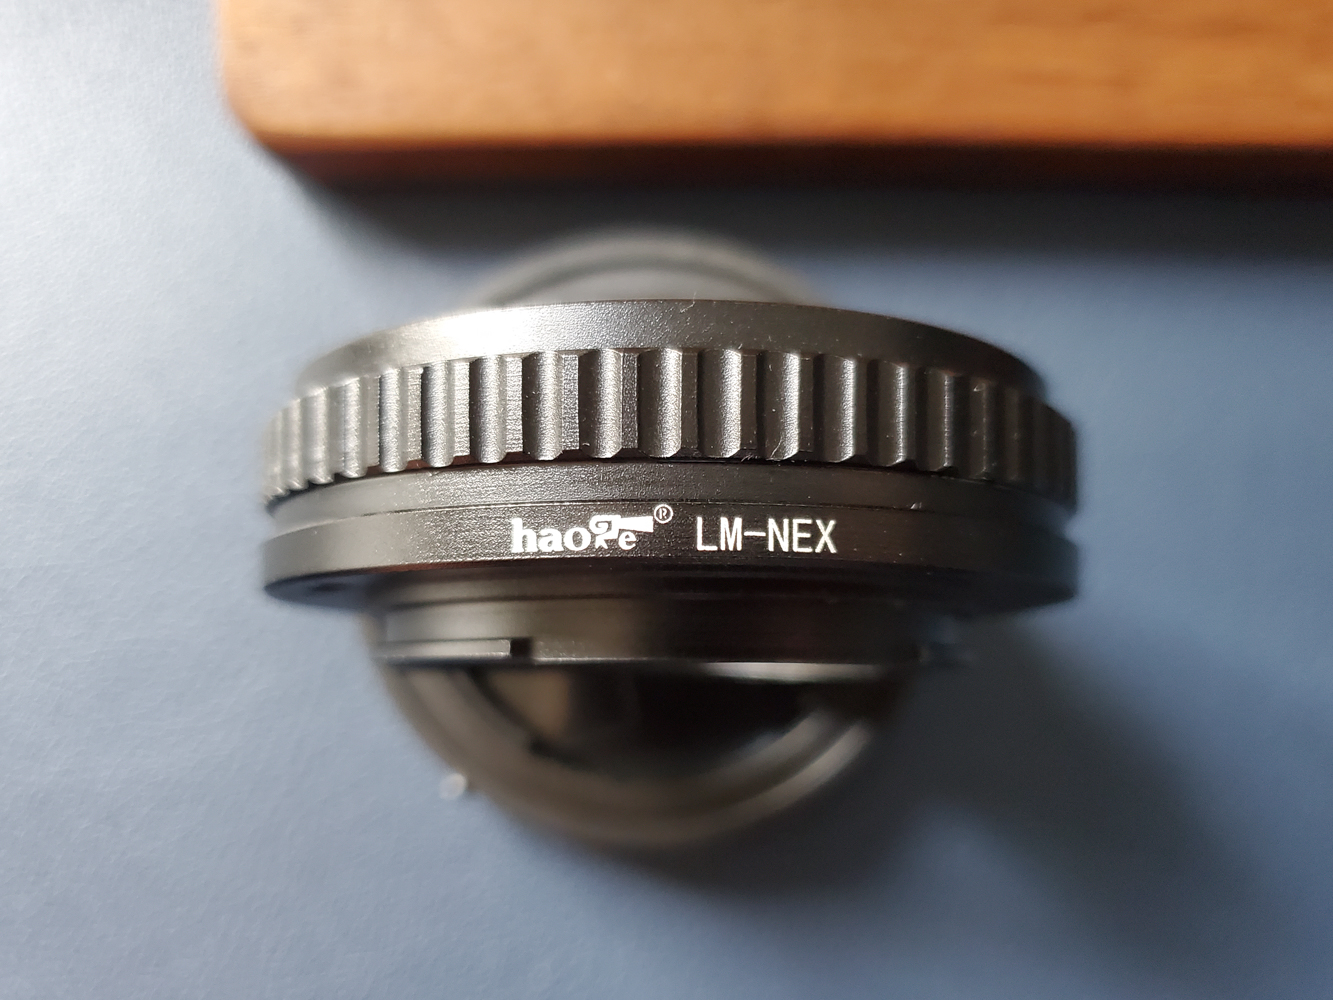
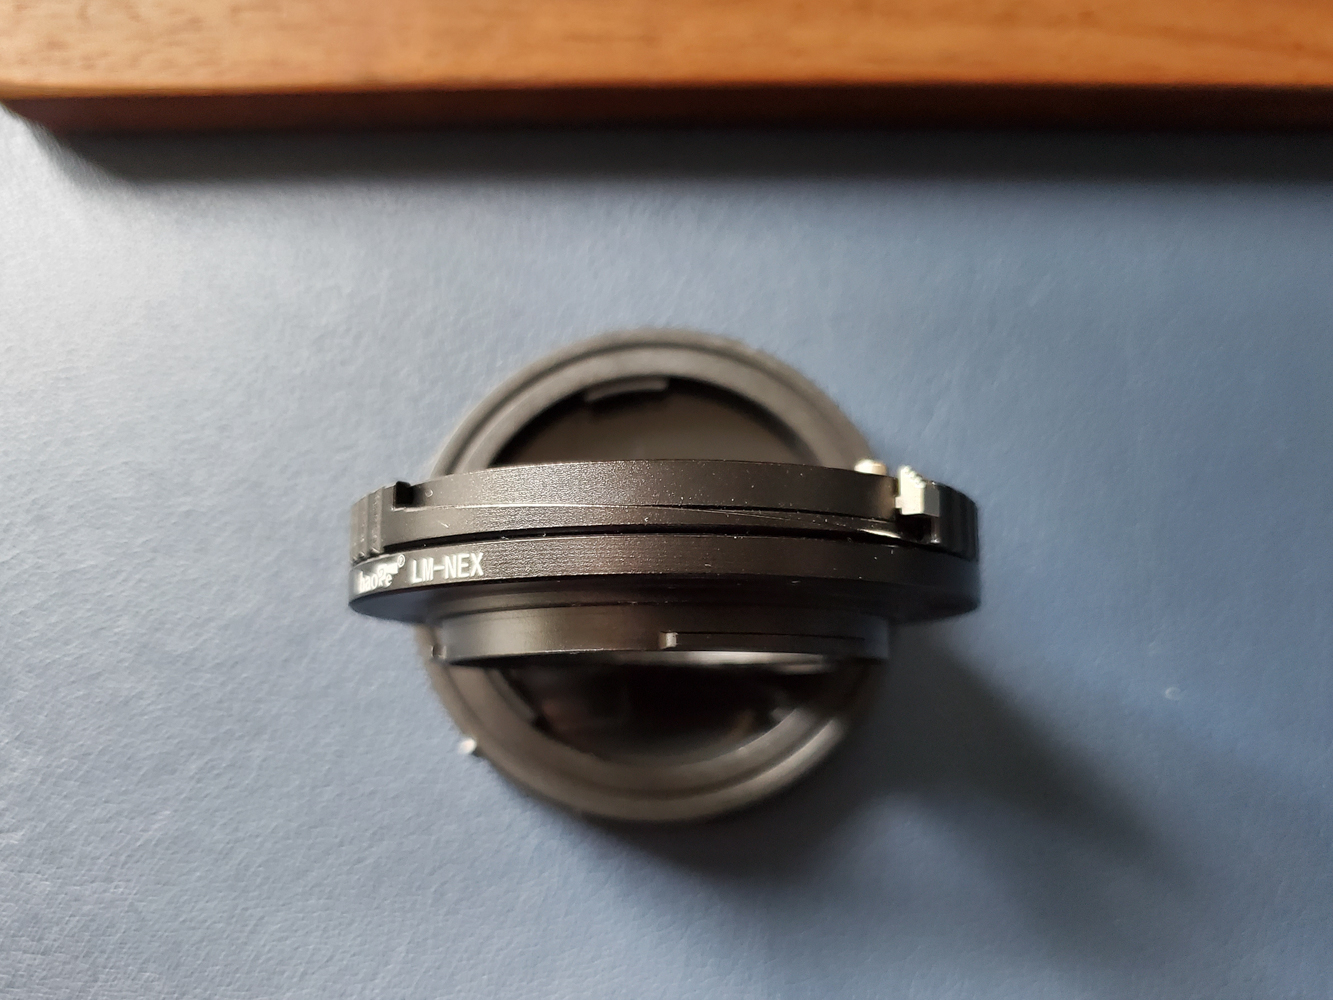
Adapter
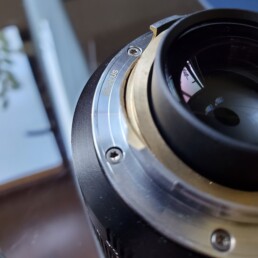
The adapter used to fit the lens onto an E mount is one from Haoge – “Haoge macro close focus lens adapter for Leica M to Sony E Mount” (Amazon / Ebay) (Affiliate links). This is an adapter that have an helicoid macro tube in it. This allows to change the minimum focal distance of the lens, in this case, from 0.7 meters to 0.25 meters.
It can be seen in the images that the adapter it’s capable of extending the lens to achieve this. The part that extends protrude from the adapter to close the focus distance, and can be contracted to return to a normal estate. The movable part of the adapter comes lubricated, so it’s important to keep this in mind and check if nothing is leaking. Although this has not happened in the time I have been using the adapter in conjunction with the lens.
In any case, the adapter has a sturdy construction (metal) and can very well sustain the 500 gr of the lens.


Handling
Being that this lens is a non native one for the E-mount cameras, all the operations for the lens are done directly on it. In this regard, manual focus is the most crucial one. Besides that, after carrying this lens in a α7II or α7C for an hour or more, you start to feel the weight of the lens and the body. There’s certainly an imbalance between the weight of the lens and the camera, so an strap is necessary for longer sessions with this lens.
Manual Focus
As stated above, the focusing wheel is big, smooth and aids to achieve precision when focusing. Pairing this with the digital zoom available in mirrorless cameras, the focusing experience is a pleasant one, although can be regarded as a slow one. Personally I’ve configured in my camera that the center wheel button activates the magnifier, so I press this every time that I want to be completely sure that I’m focusing accurately.
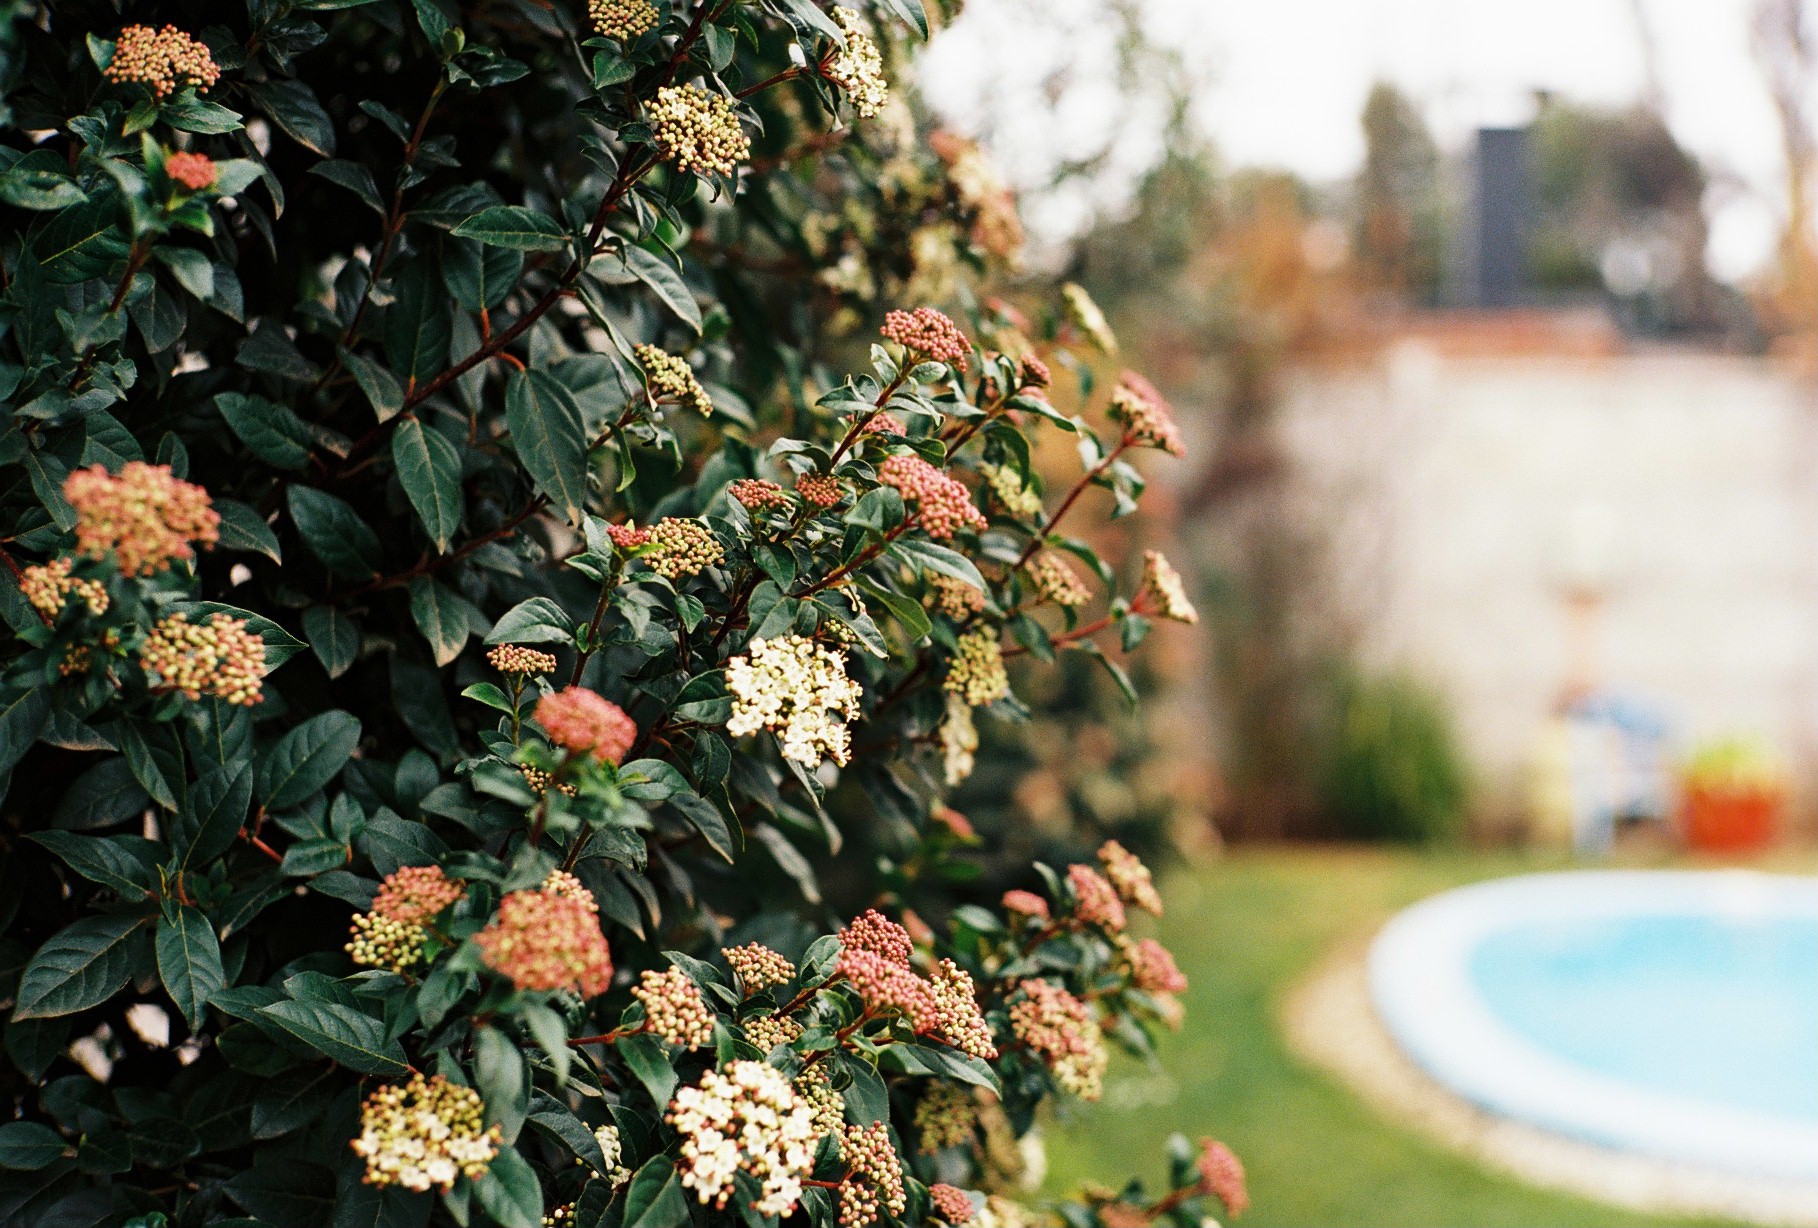
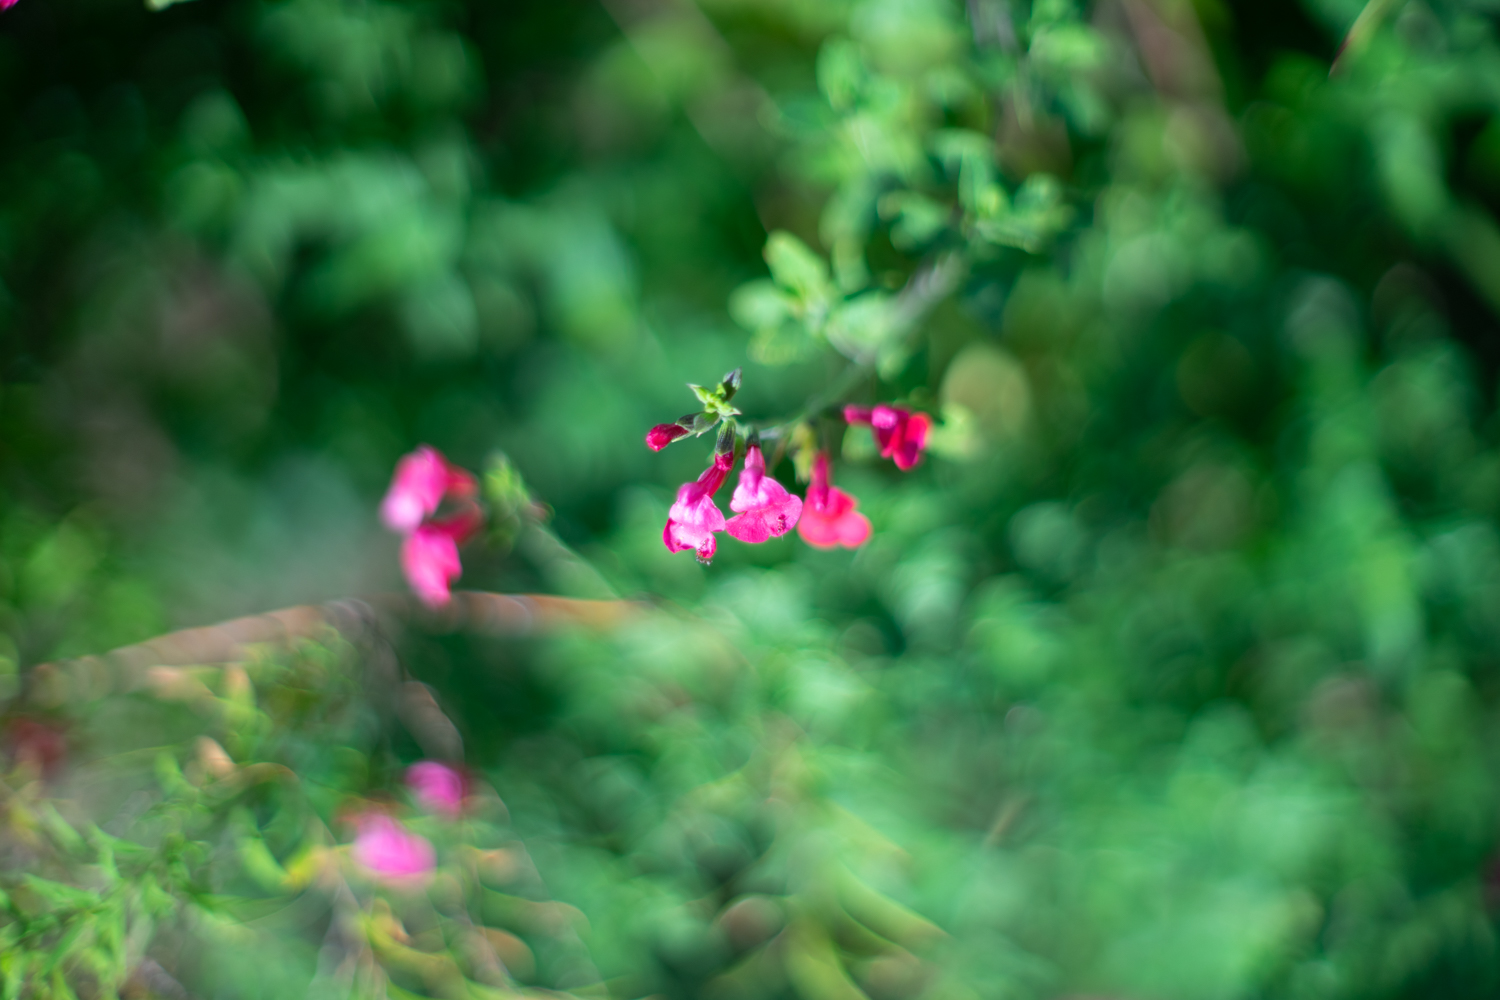
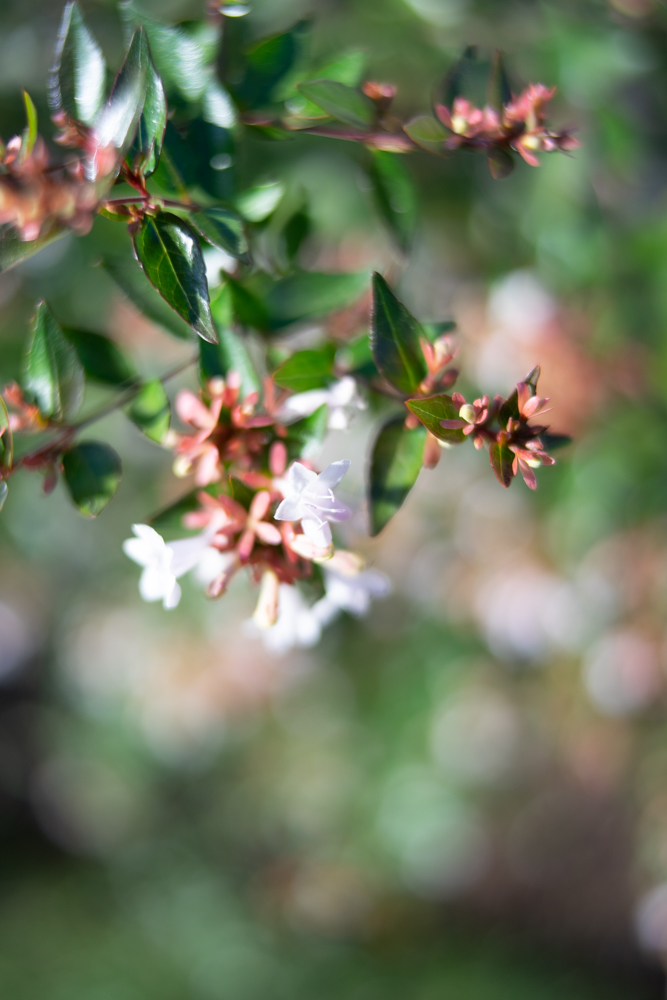
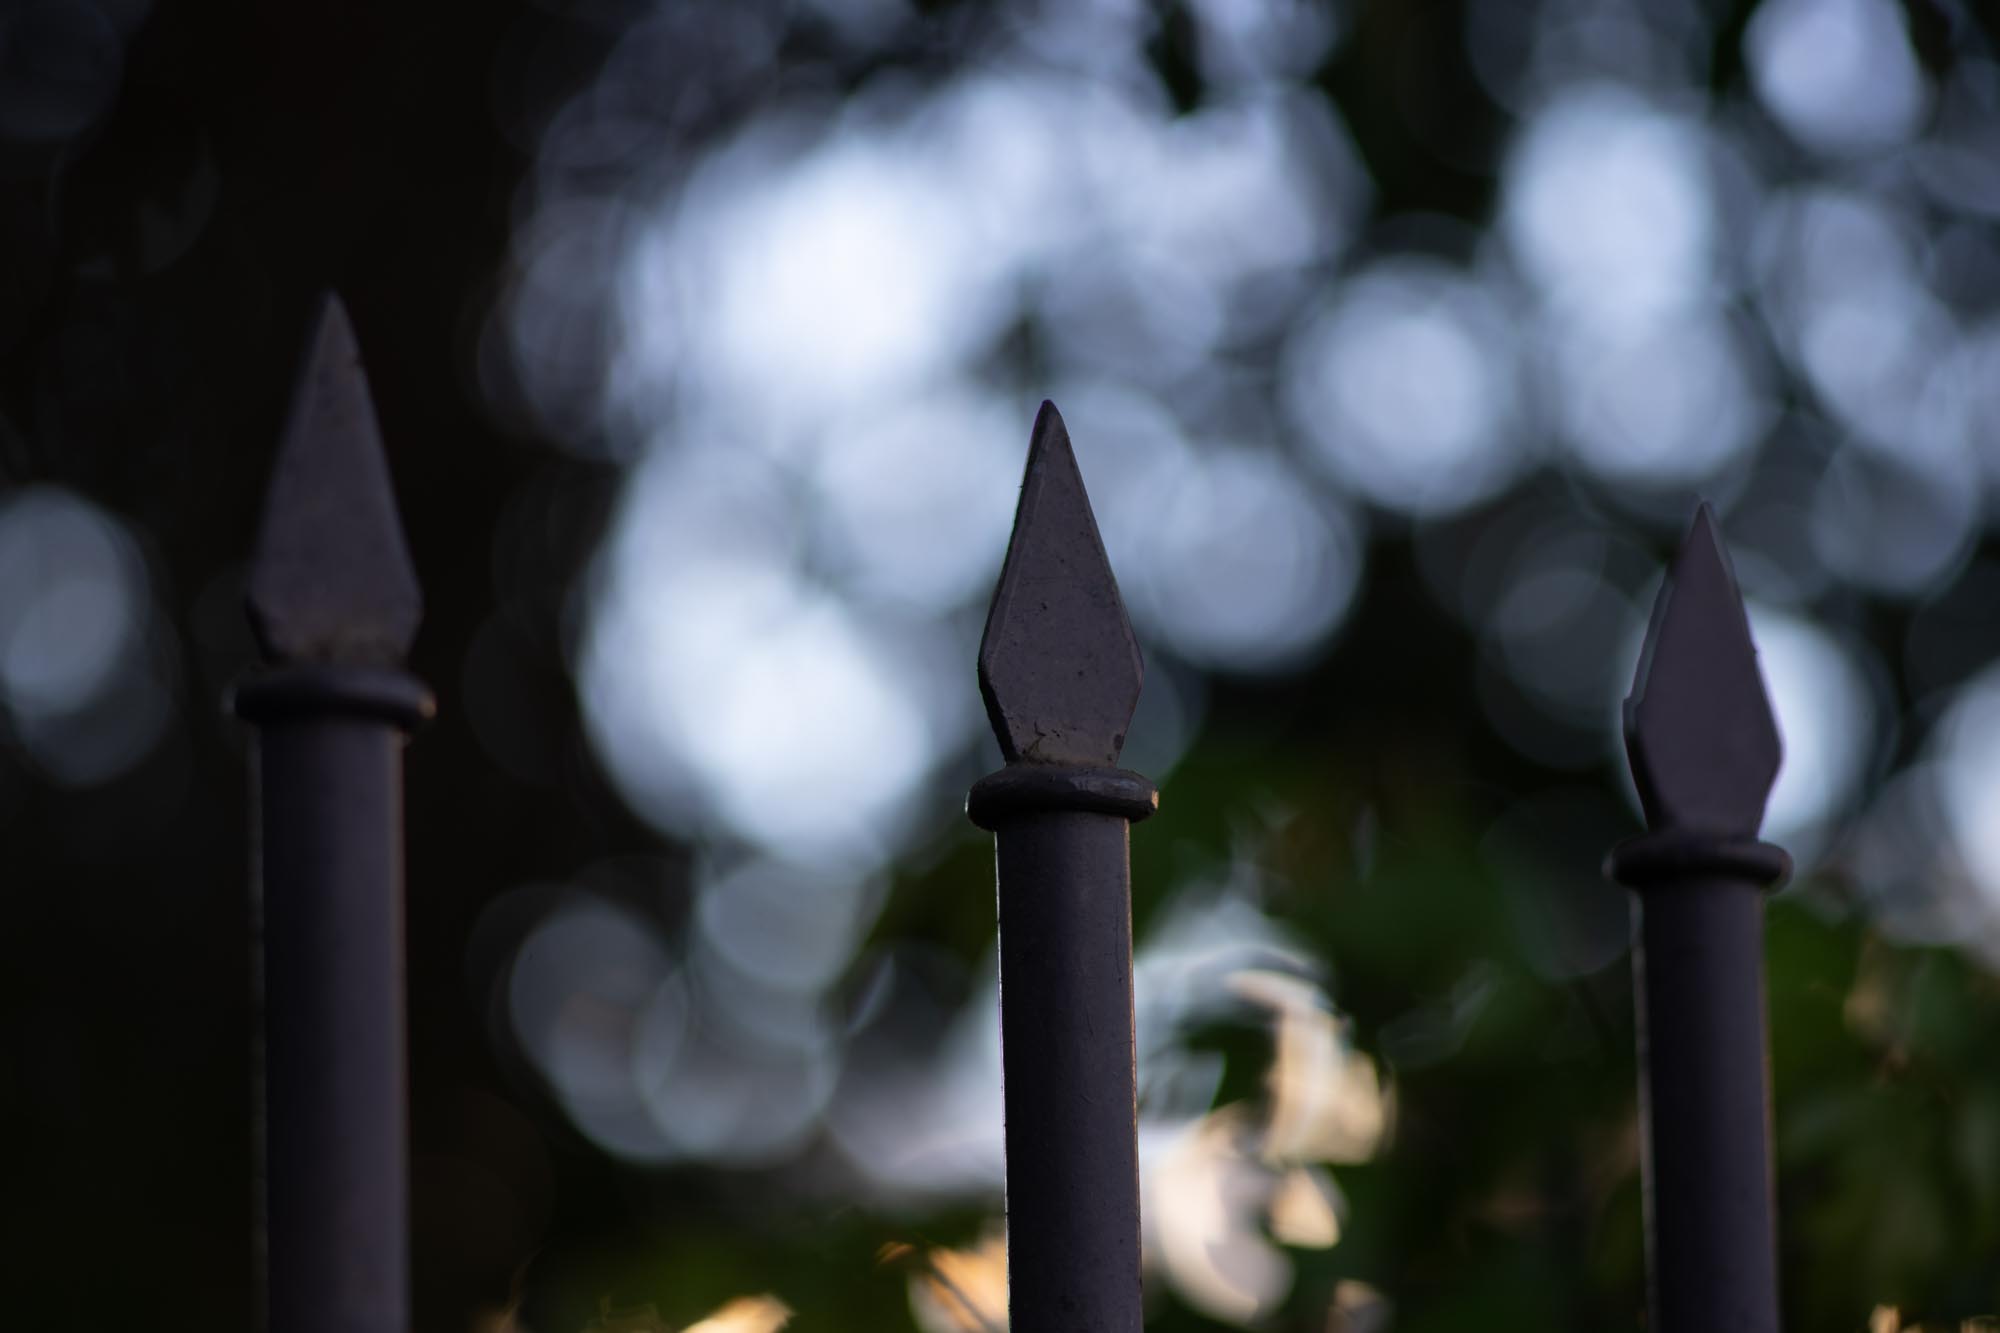
Bokeh
Being an f/1.4 lens one would expect a rather pleasant and “dreamy” bokeh and indeed you get it, but it’s a little more complicated than your usual “portrait” lens. The minimum focal distance of 70 cm makes the bokeh somewhat mild at f/1.4, needing a greater separation from the background and your subject, making this lens specially useful in environmental portraits. When using the helicoid adapter, the characteristics of the lens change completely and the bokeh is transformed as well. I must say that i find it hard to justify the use of the helicoid adapter for only this purpose, but ultimately it is a tool that is available, as needed.
The bokeh tends to form an “swirly” pattern in the borders, worth mentioning to check if that’s a desired characteristic or not.
Below you can find examples of the bokeh in different situations. Also, check the video above to sea a more realistic approach.
Helicoid adapter protruded


Normal MFD


Distortion
At f/1.4 the falloff is pretty strong in the borders, as seen in the first comparison. At f/8 is the sweet spot for it, showing little to none falloff in the borders.
There isn’t an official profile for this lens, so the one I use in Lightroom is the “Leica SUMMILUX-M 28mm f/1.4 ASPH”.
F/1.4


Up: No profile. / Down: Profile applied.
F/8

Up: No profile. / Down: Profile applied.
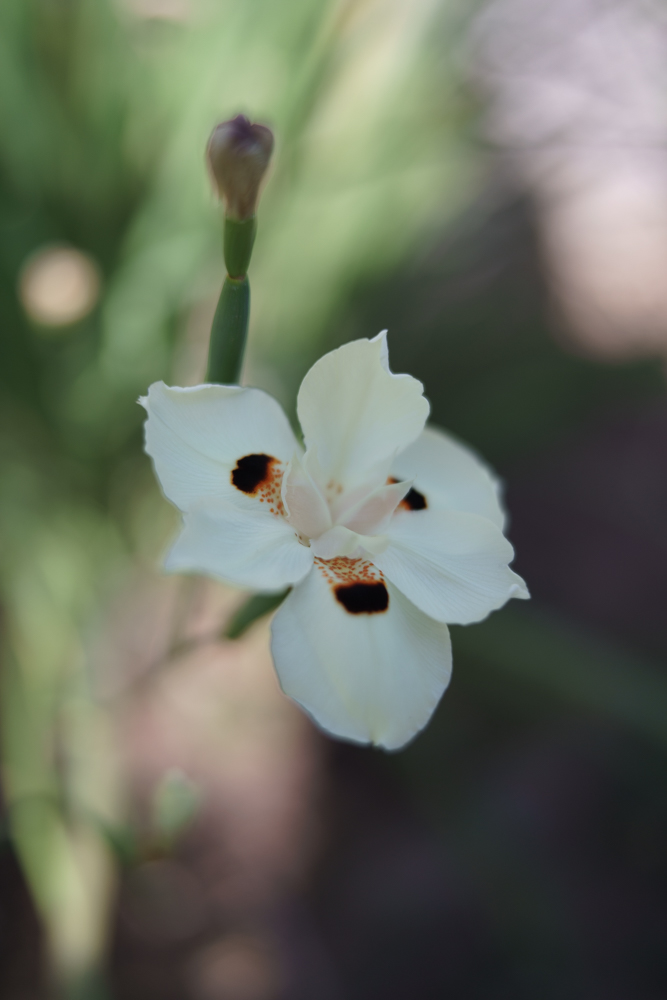
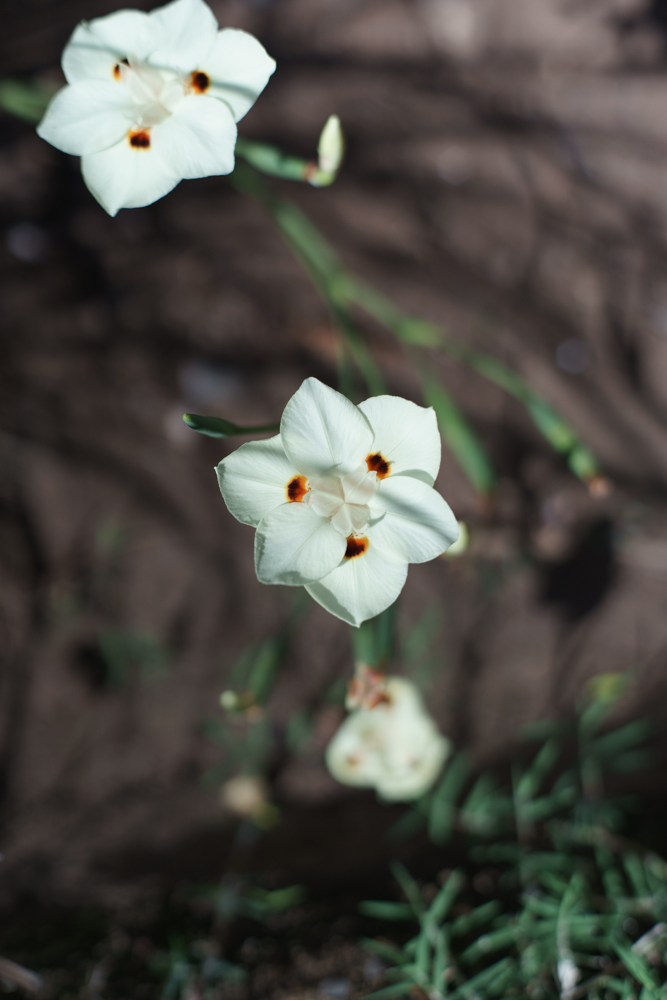
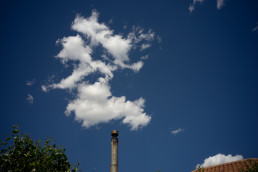
Gallery


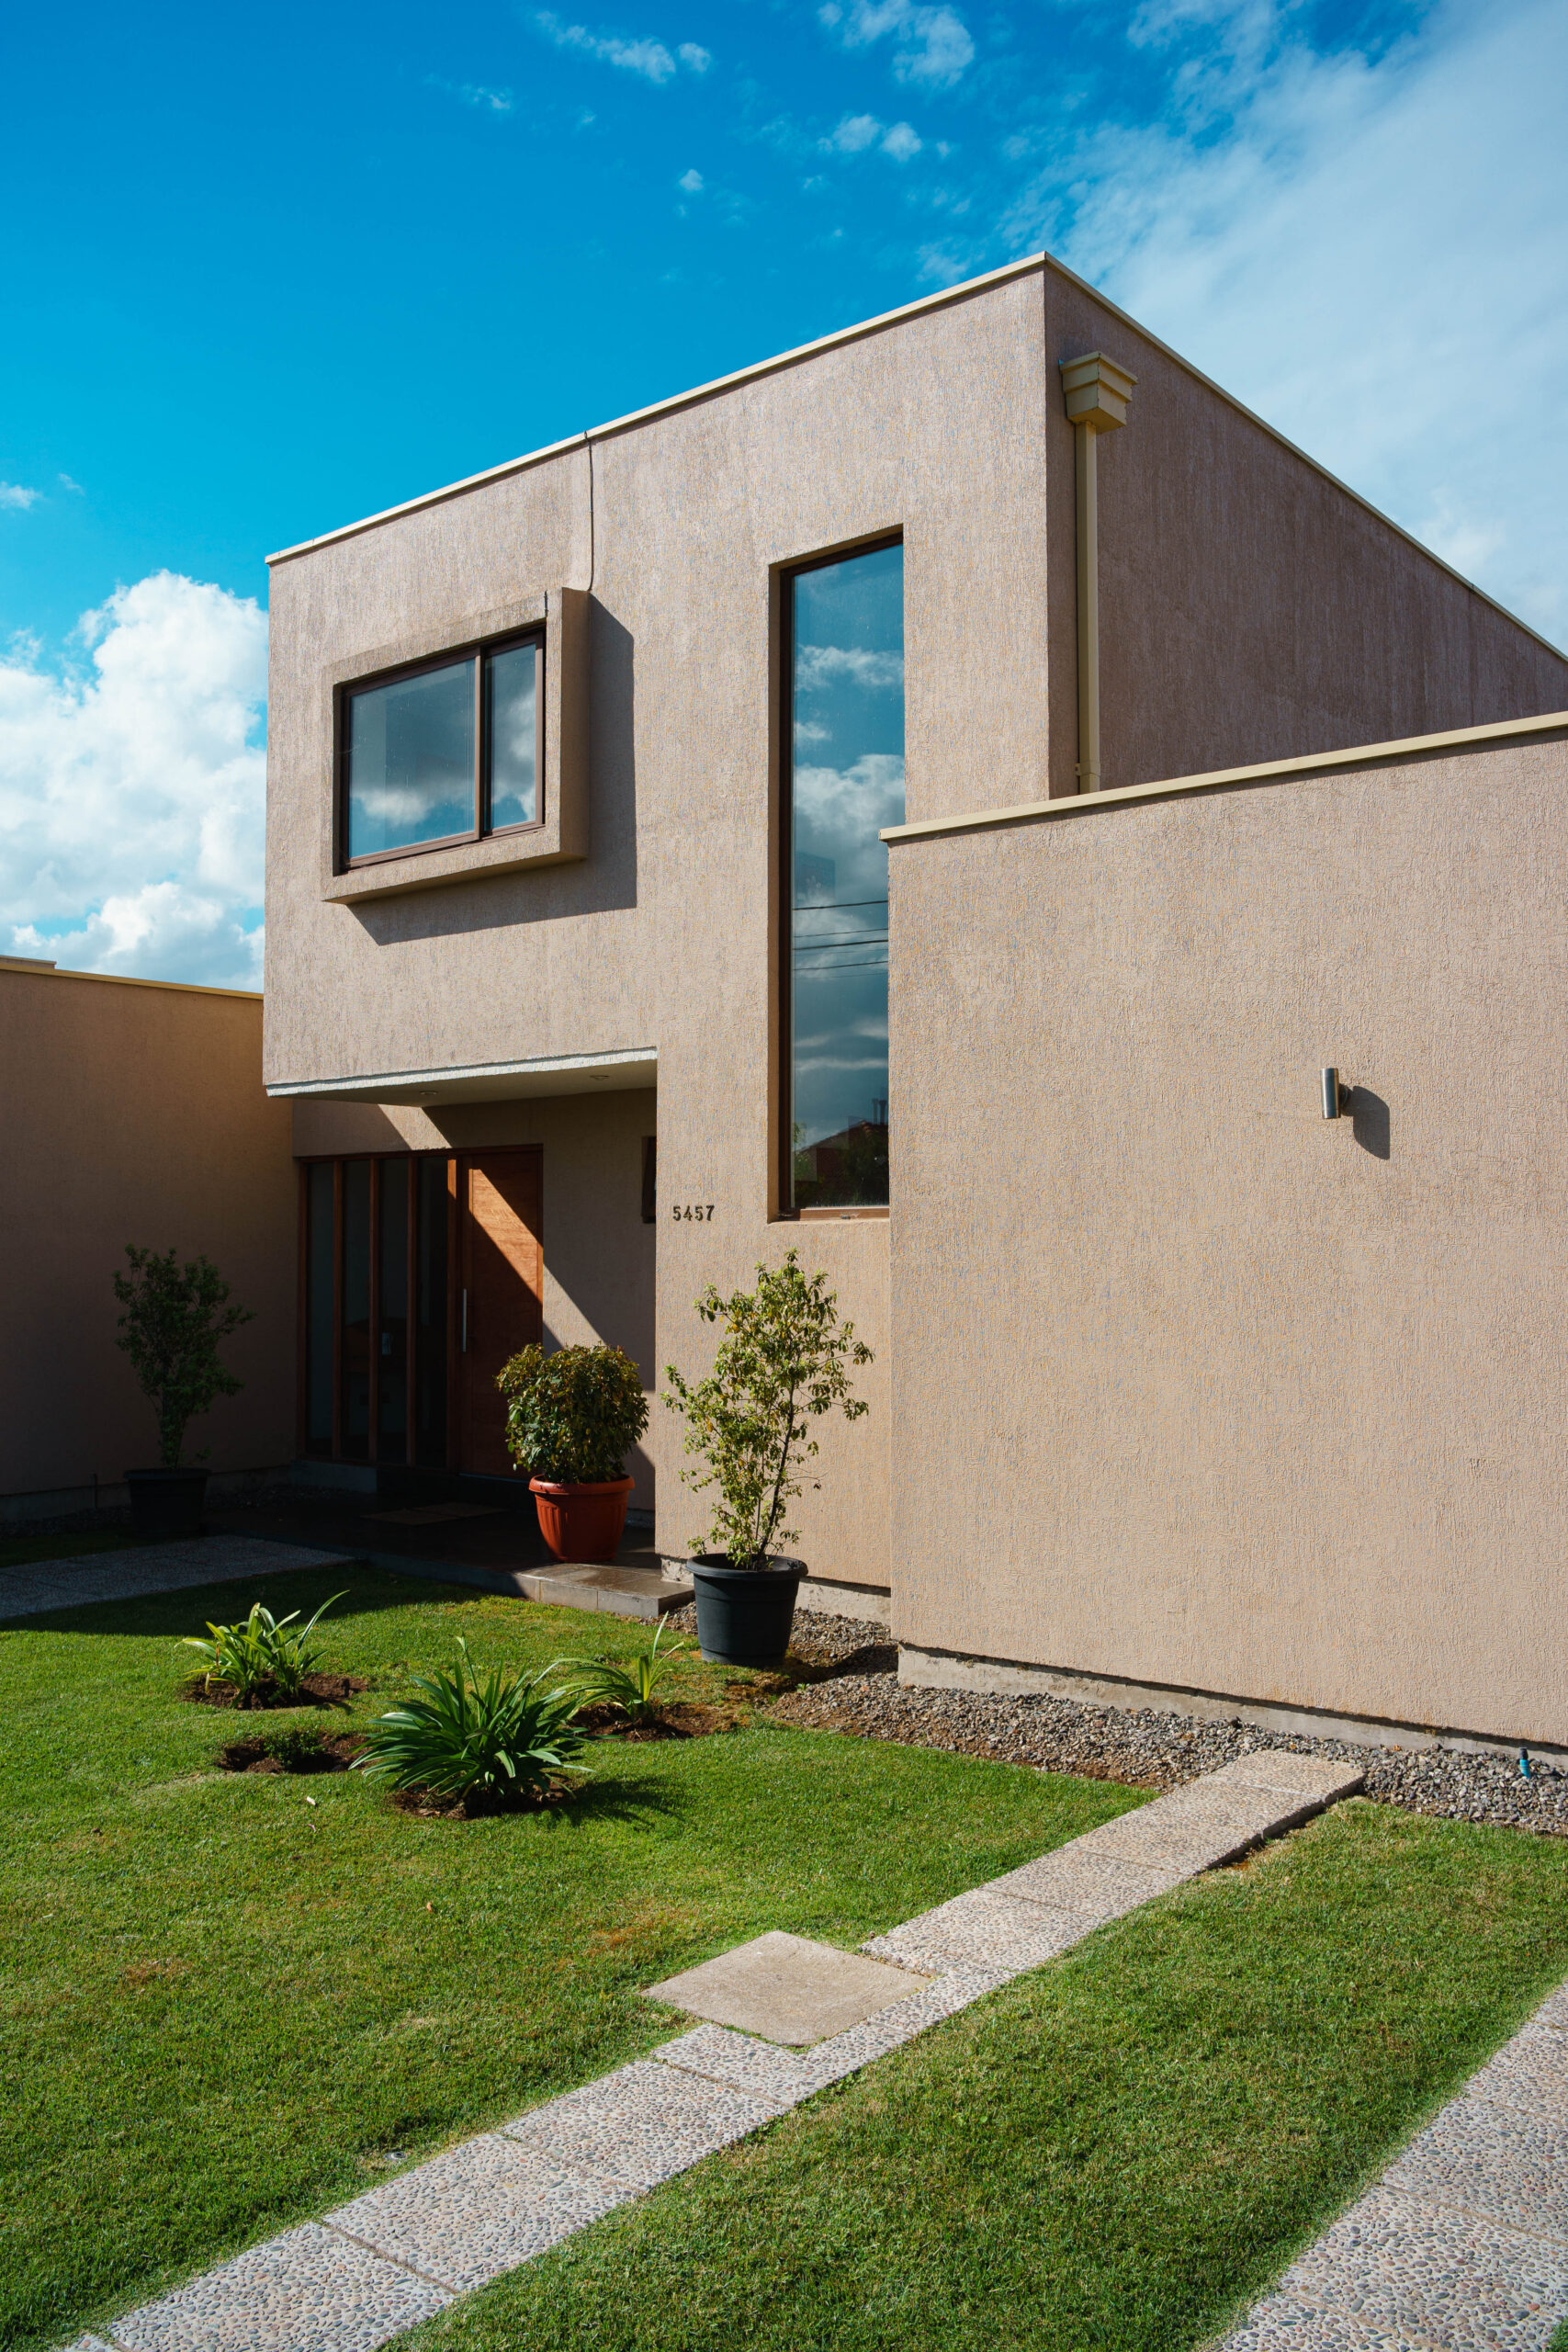

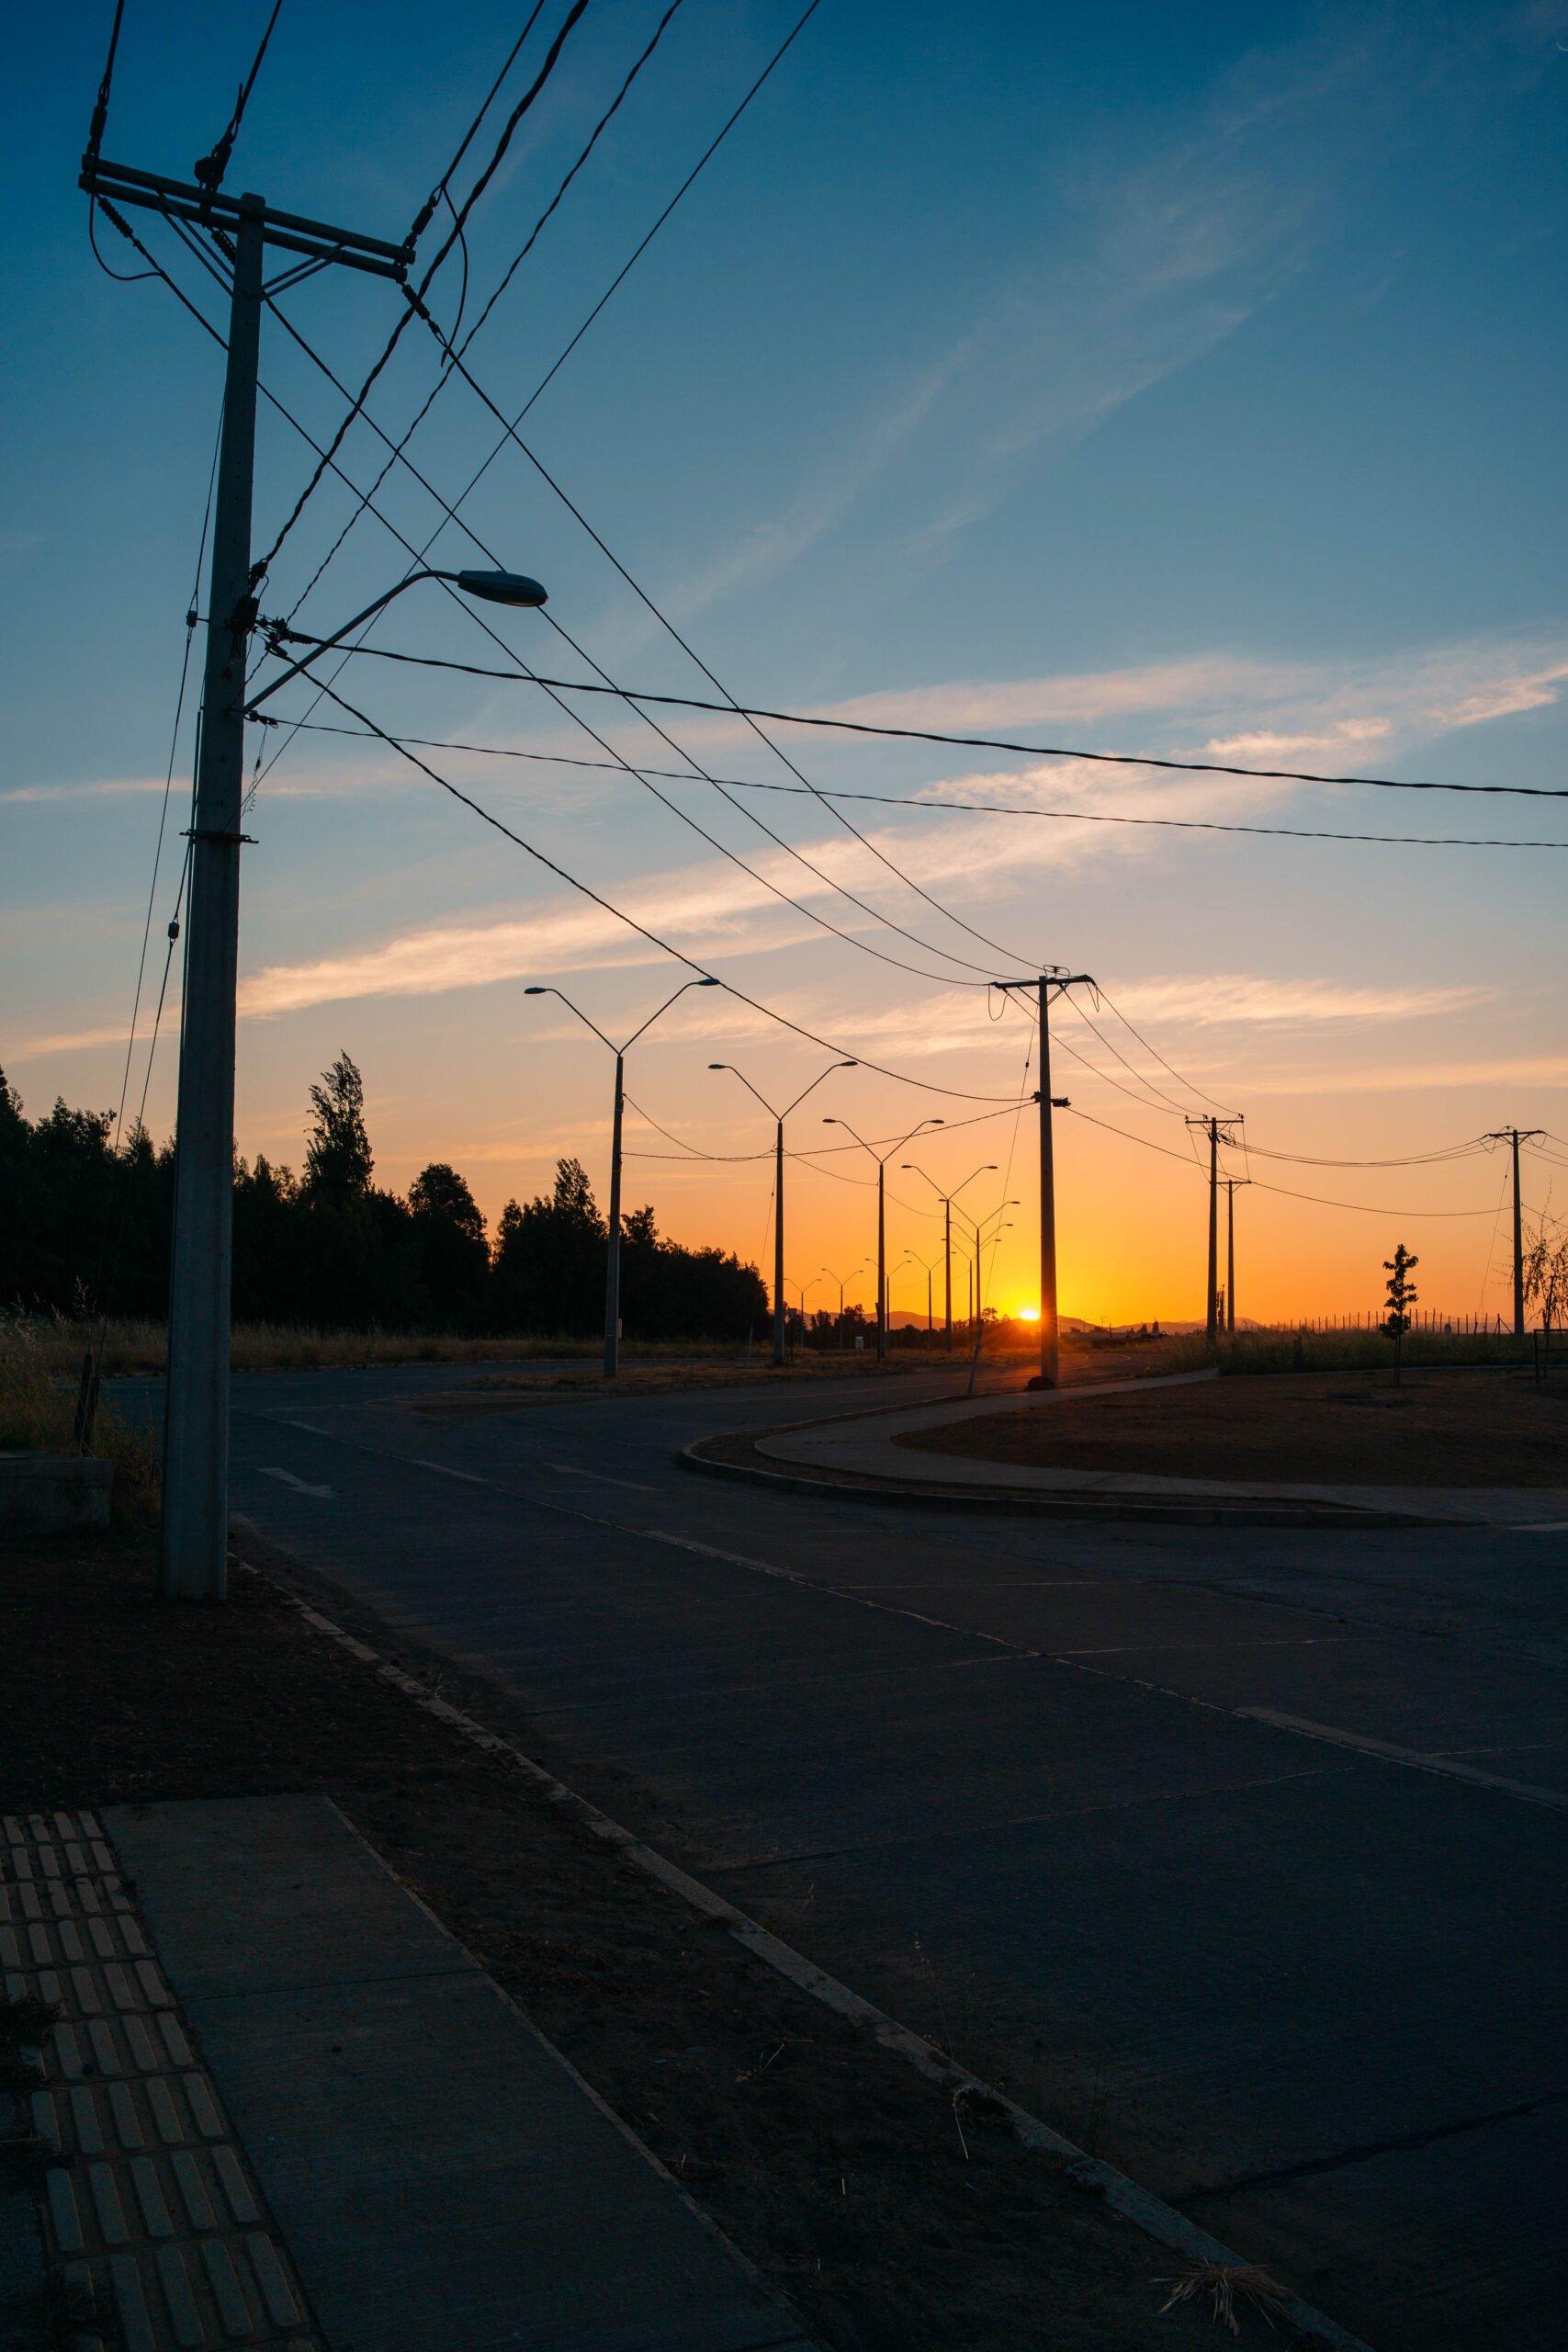


Photos are processed in Lightroom, primarily are color corrected and adjusted for personal preference. There’s no extra sharpening, added texture or clarity on them.
Conclusions
There’s no doubt that using this lens confers a certain “good” feeling, whether that is for the manual operation, the balanced weight or the design itself. The images you get are sharp and with a lovely rendering, although you have to be mindful of your situation. For example, I wouldn’t use this lens for astrophotography, at his maximum aperture the corners left a lot to be desired. One could label this lens as an environmental portrait lens, besides the usual landscape or so, but the use cases can be way beyond that. Nevertheless, you need to learn to use this lens in order to take full advantage of it, as is usually the case with manual lenses.
Now nitpicking.
- The weight (to me) is one of the factors that make me second guessing to choose this lens among other lighter one, mainly for extended sessions or for carrying it around on hand.
- The fact that the bokeh can be somewhat disappointing near the MFD of 70 cm, or busy as other put it. For the swirly patterns, the cat eyes, etc.
- Sometimes a greenish tint can be seen in the photos.
- That’s a common problem for M lenses in Sony Sensors.
Although the exterior design is a copy of the Leica lenses, 7artisans end up surprising us in terms of image quality and construction. We are used to “high prices equals high quality”, but the more we are interested in photography in general, the more quickly we realize that there is a diminishing return on it. Other factors come into play when you take photos for the art and not for top-notch equipment.
Alternatives.
- Sony SEL28F20 FE 28mm f/2
- Samyang (Rokinon) FE 24mm f/2.8
Get one!
Support the blog!


Canon nFD 135mm f/3.5 - Review
Cako

Characteristics
- Lens Mount: nFD
- Type: Prime lens
- Focusing: Manual
- Construction:
- Lens Groups: 4
- Lens Element: 4
- Aperture Blades: 6
- Straight
- Min. Aperture: 3.5
- Max Aperture: 32
- Min. Focal distance: 1.3 m
- Filter Size: 52 mm
- Length: 85 mm
- Weight: 325 gr
- Hood: Yes, attached to the lens.
- Price (used): USD 20- USD 70 / Jan - 2021
- Ebay.com *
- * : Affiliate Link
- Ebay.com *
Introduction
As Canon Lenses go, the FD line up is legendary. Producing astonishingly good lenses that rivals today standard ones, and we are talking of lenses that were fabricated almost 40 years ago. This lens does not seem to falter when paired with a high resolution sensor, and its capable of producing amazing images taking into account its limitations.
So, let’s see how this lens behaves.
- All the photos in this review are from a Sony α7 II camera.
- 24mp full frame sensor.
- On body stabilization
Updates:
April 05 of 2021
- Added images for bokeh comparisons at different f-stops
Construction


Adapter

Adapting this lens to mirrorless cameras is as easy as getting the right adapter. A “nice” and budget recommendation is a K&F adapter, although there are pricier ones.
Handling
This lens is easy to transport and handle due to its light weight. This is because of the plastic and metal construction that it has, which could lead you to think that it feels flimsy, but it is the opposite. The construction of this lens has stood the test of time and the possible abuse that it can entail.
Manual Focus
In this regard, my copy has a little play in the focus ring, nevertheless is good enough to focus accurately. Focusing takes a little bit more than half a turn from close range (1.3m) to infinity. This could complicate precise focusing, but is achievable.
Bokeh
We have a long focal length, a minimum distance of 1.3 meters and a maximum aperture of 3.5. With that in mind, the bokeh produced by this lens is lovely when you manage to have a big separation between your subject and the foreground. Personally I don’t find it distracting, regardless of the background.
When the situation is right it can blend seamlessly in the photo and give an overall dreamy tone to the image. Take a look at the samples to get an overall idea of this.


Distortion
The applied profile is “Canon FD 135mm F2.5 SC” as there’s no native profile for this lens.
As such, the lens has a visible fall off in the corners, but is easily fixable with the profile and can be adjusted further if necessary.

Up: No profile. / Down: Profile applied.


RAW photos are developed in Lightroom with the profile Canon FD 135mm F2.5 SC.
Sharpness

High resolution (28 mb)
- At f 3.5 it’s fairly sharp from corner to corner, but the extreme corners suffer a little bit.
- The sweet spot for sharpness is between f 5.6 and f 16. You can get usable results beyond that, but refraction kicks in and the image get degraded overall.
- Overall, a really great performer, when taking in account the little details.

Full image at f/3.5
Gallery


Photos are processed in Lightroom, primarily are color corrected and adjusted for personal preference. There’s no extra sharpening, added texture or clarity on them. Just a taste of what can be achieved with this lens.
Conclusions
This lens was a surprise, a good one. The low weight , low cost and great image quality just add to the overall good feeling that this lens gives. Granted that’s not a perfect one, the f/3.5 doesn’t help with an spectacular bokeh, or taking low light photos, At most, f/11 it’s the higher usable stop. Beyond that, refraction creeps in and images become pretty ugly. But for a light telephoto lens, for hiking or traveling, works wonderfully.
Where to buy?
- Buy: Ebay *
- * : Affiliate Link
Get one!
Buy: Ebay * / (Affiliate Link)
Support the blog!

2020 a year in photos

Cako
Was 2020 a bad year? No. Was a hard one? Totally.
As photography goes, a chance to rediscover the light, the editing process and the dreaded task of keeping the photo library clean and valuable, fill with memories and the work that it’s worth to keep.-
Here’s to a 2021 that has it a bit easy in hindsight.